Celebrate Pride with a Mickalene Thomas-Inspired Art Activity

On Saturday, June 3, SAM staff will participate in Seattle Pride in the Park to celebrate the city’s LGBTQIA+ community. This all-ages, family-friendly event features Drag Queen Storytime, youth spaces, lively performances, food trucks, nonprofit booths, queer vendors, and more. We’ll be at Volunteer Park from 12–7 pm to facilitate an art activity and spread the word about our upcoming programs and exhibitions.

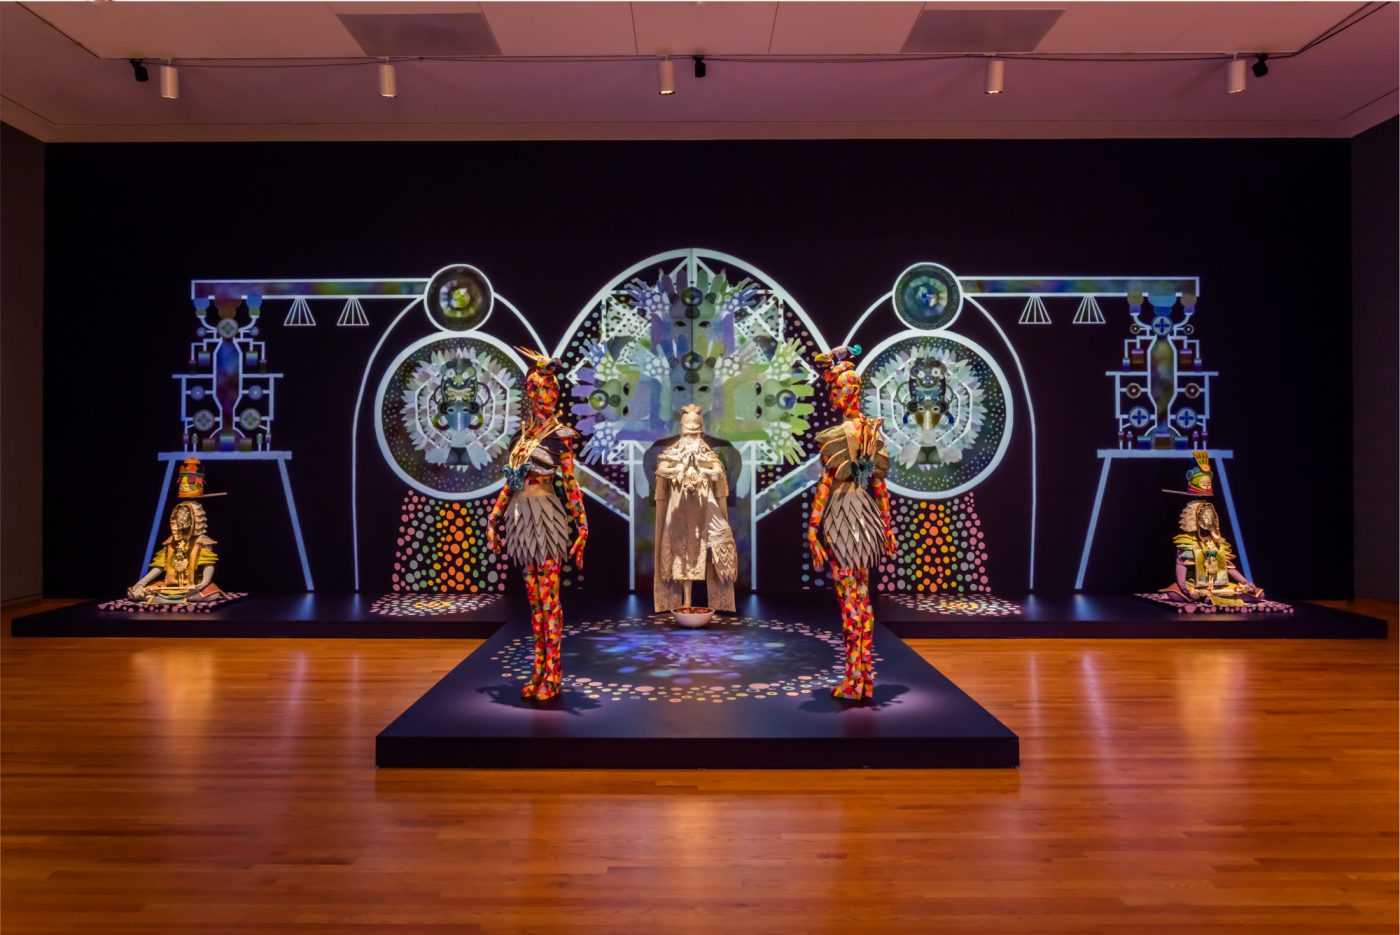
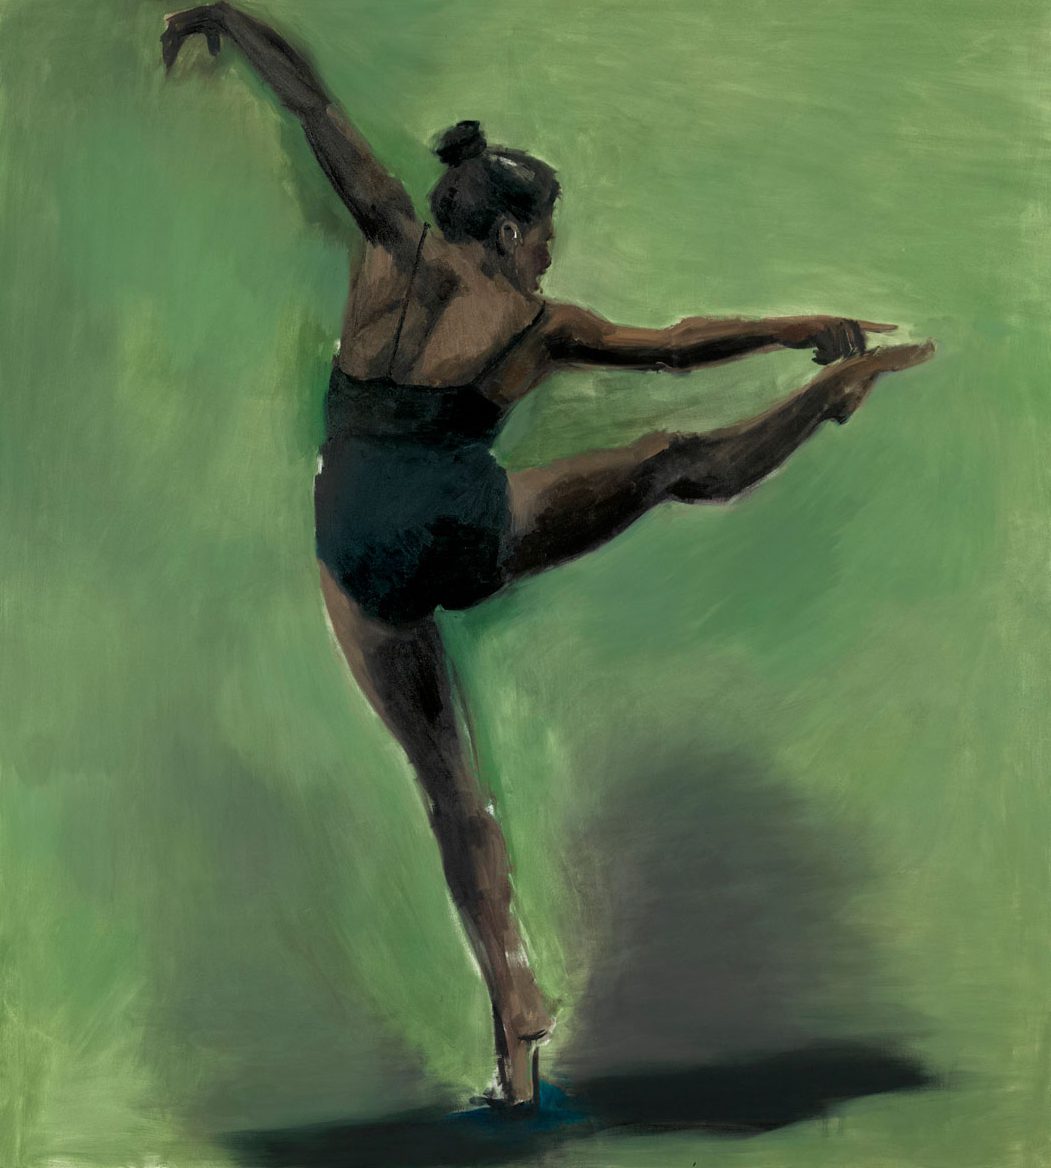
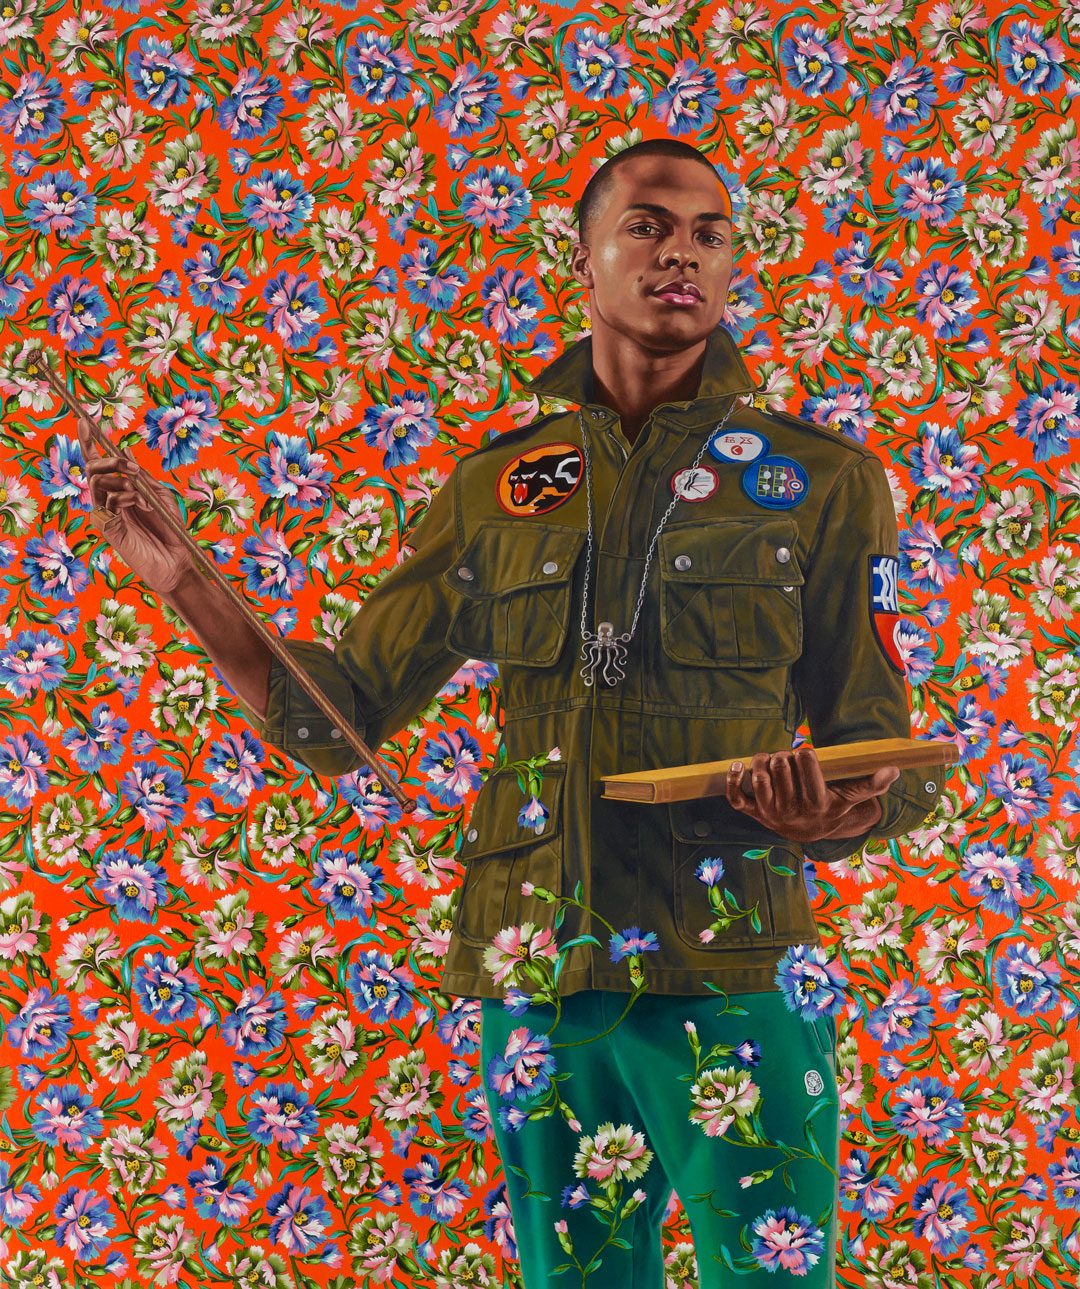
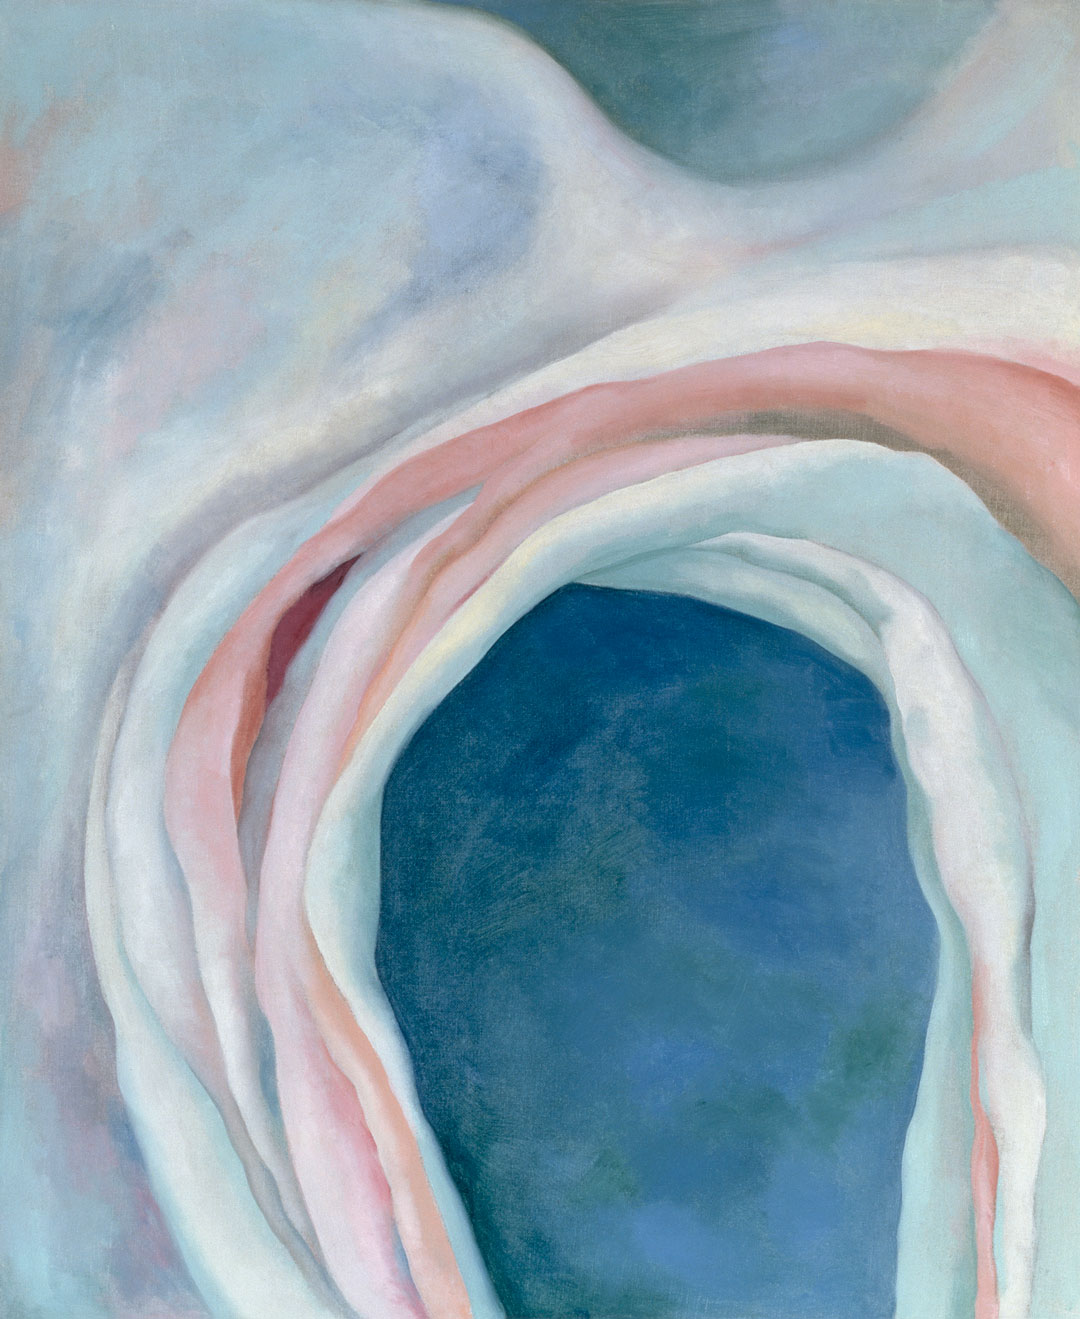
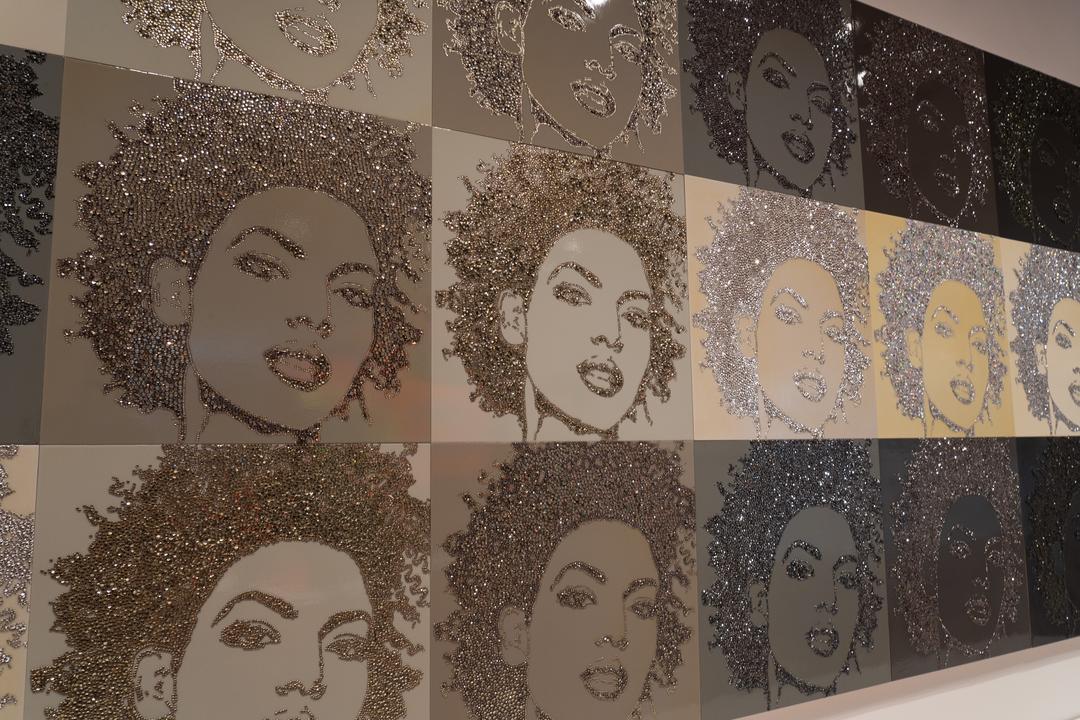
As I brainstormed ideas for a fun, engaging, and educational art activity for Pride, one of my personal favorite artists, Mickalene Thomas, came to mind. Thomas’s work embodies the spirit of inclusivity, and her use of bold colors challenge traditional notions of beauty, gender, race, and identity. She is a Black queer contemporary artist that creates colorful and lustrous paintings, collages, photography, videos, and installations and uses materials like paint, pictures, colorful patterns, and rhinestones in her large-scale paintings. In 2018, SAM mounted Figuring History, an exhibition of her work alongside fellow artists Robert Colescott and Kerry James Marshall. Here’s a Seattle Times video interview about the show.

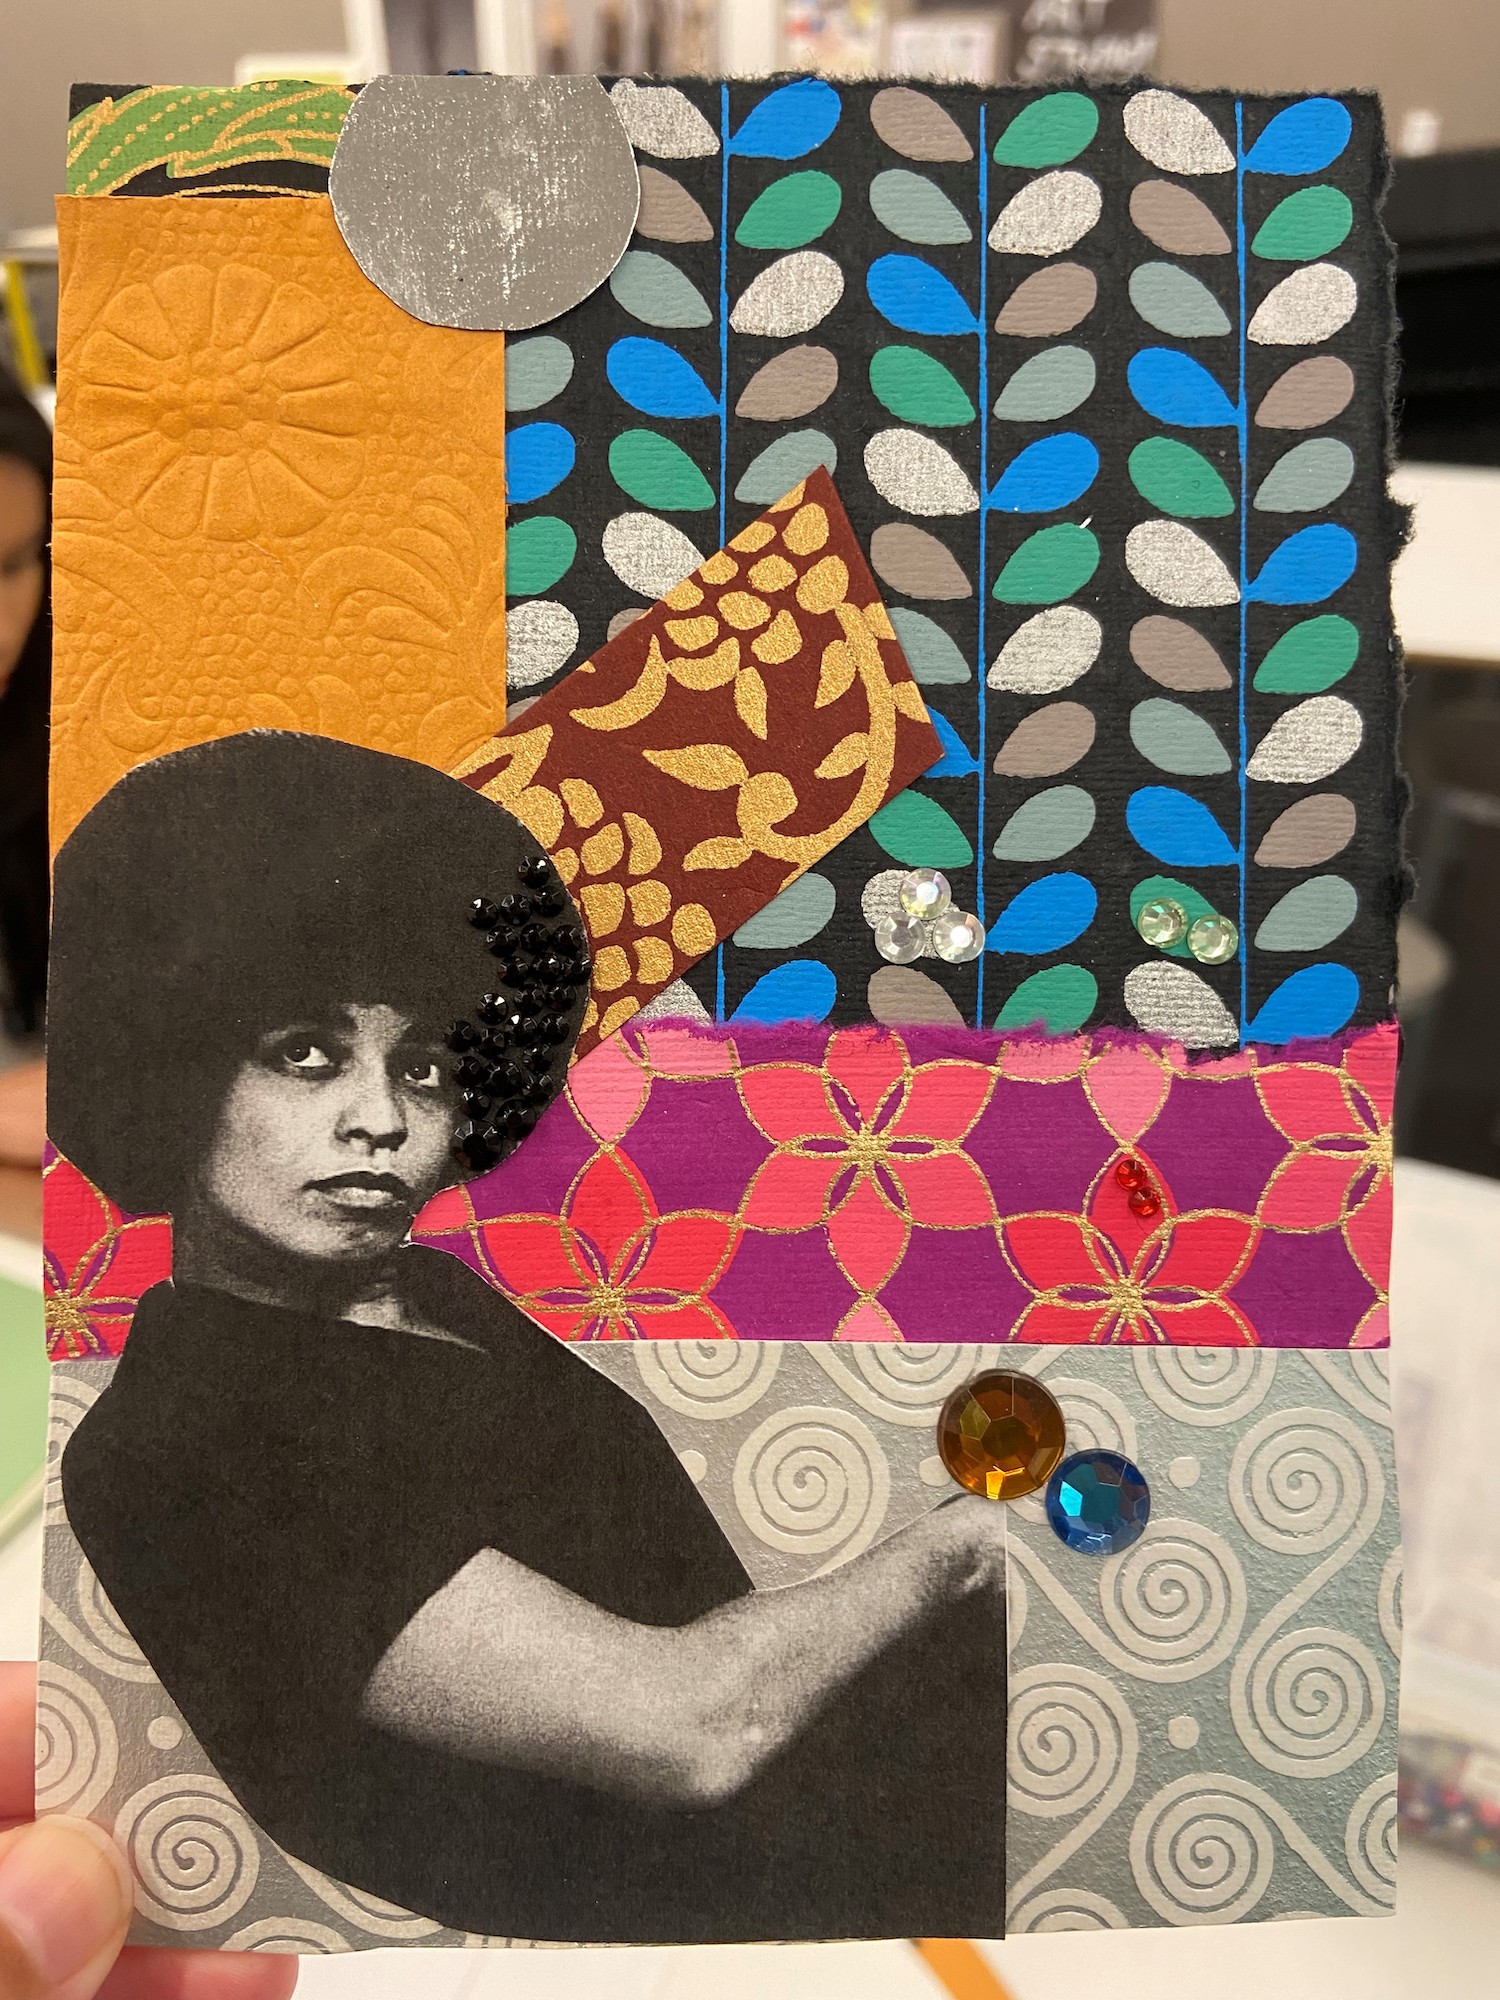
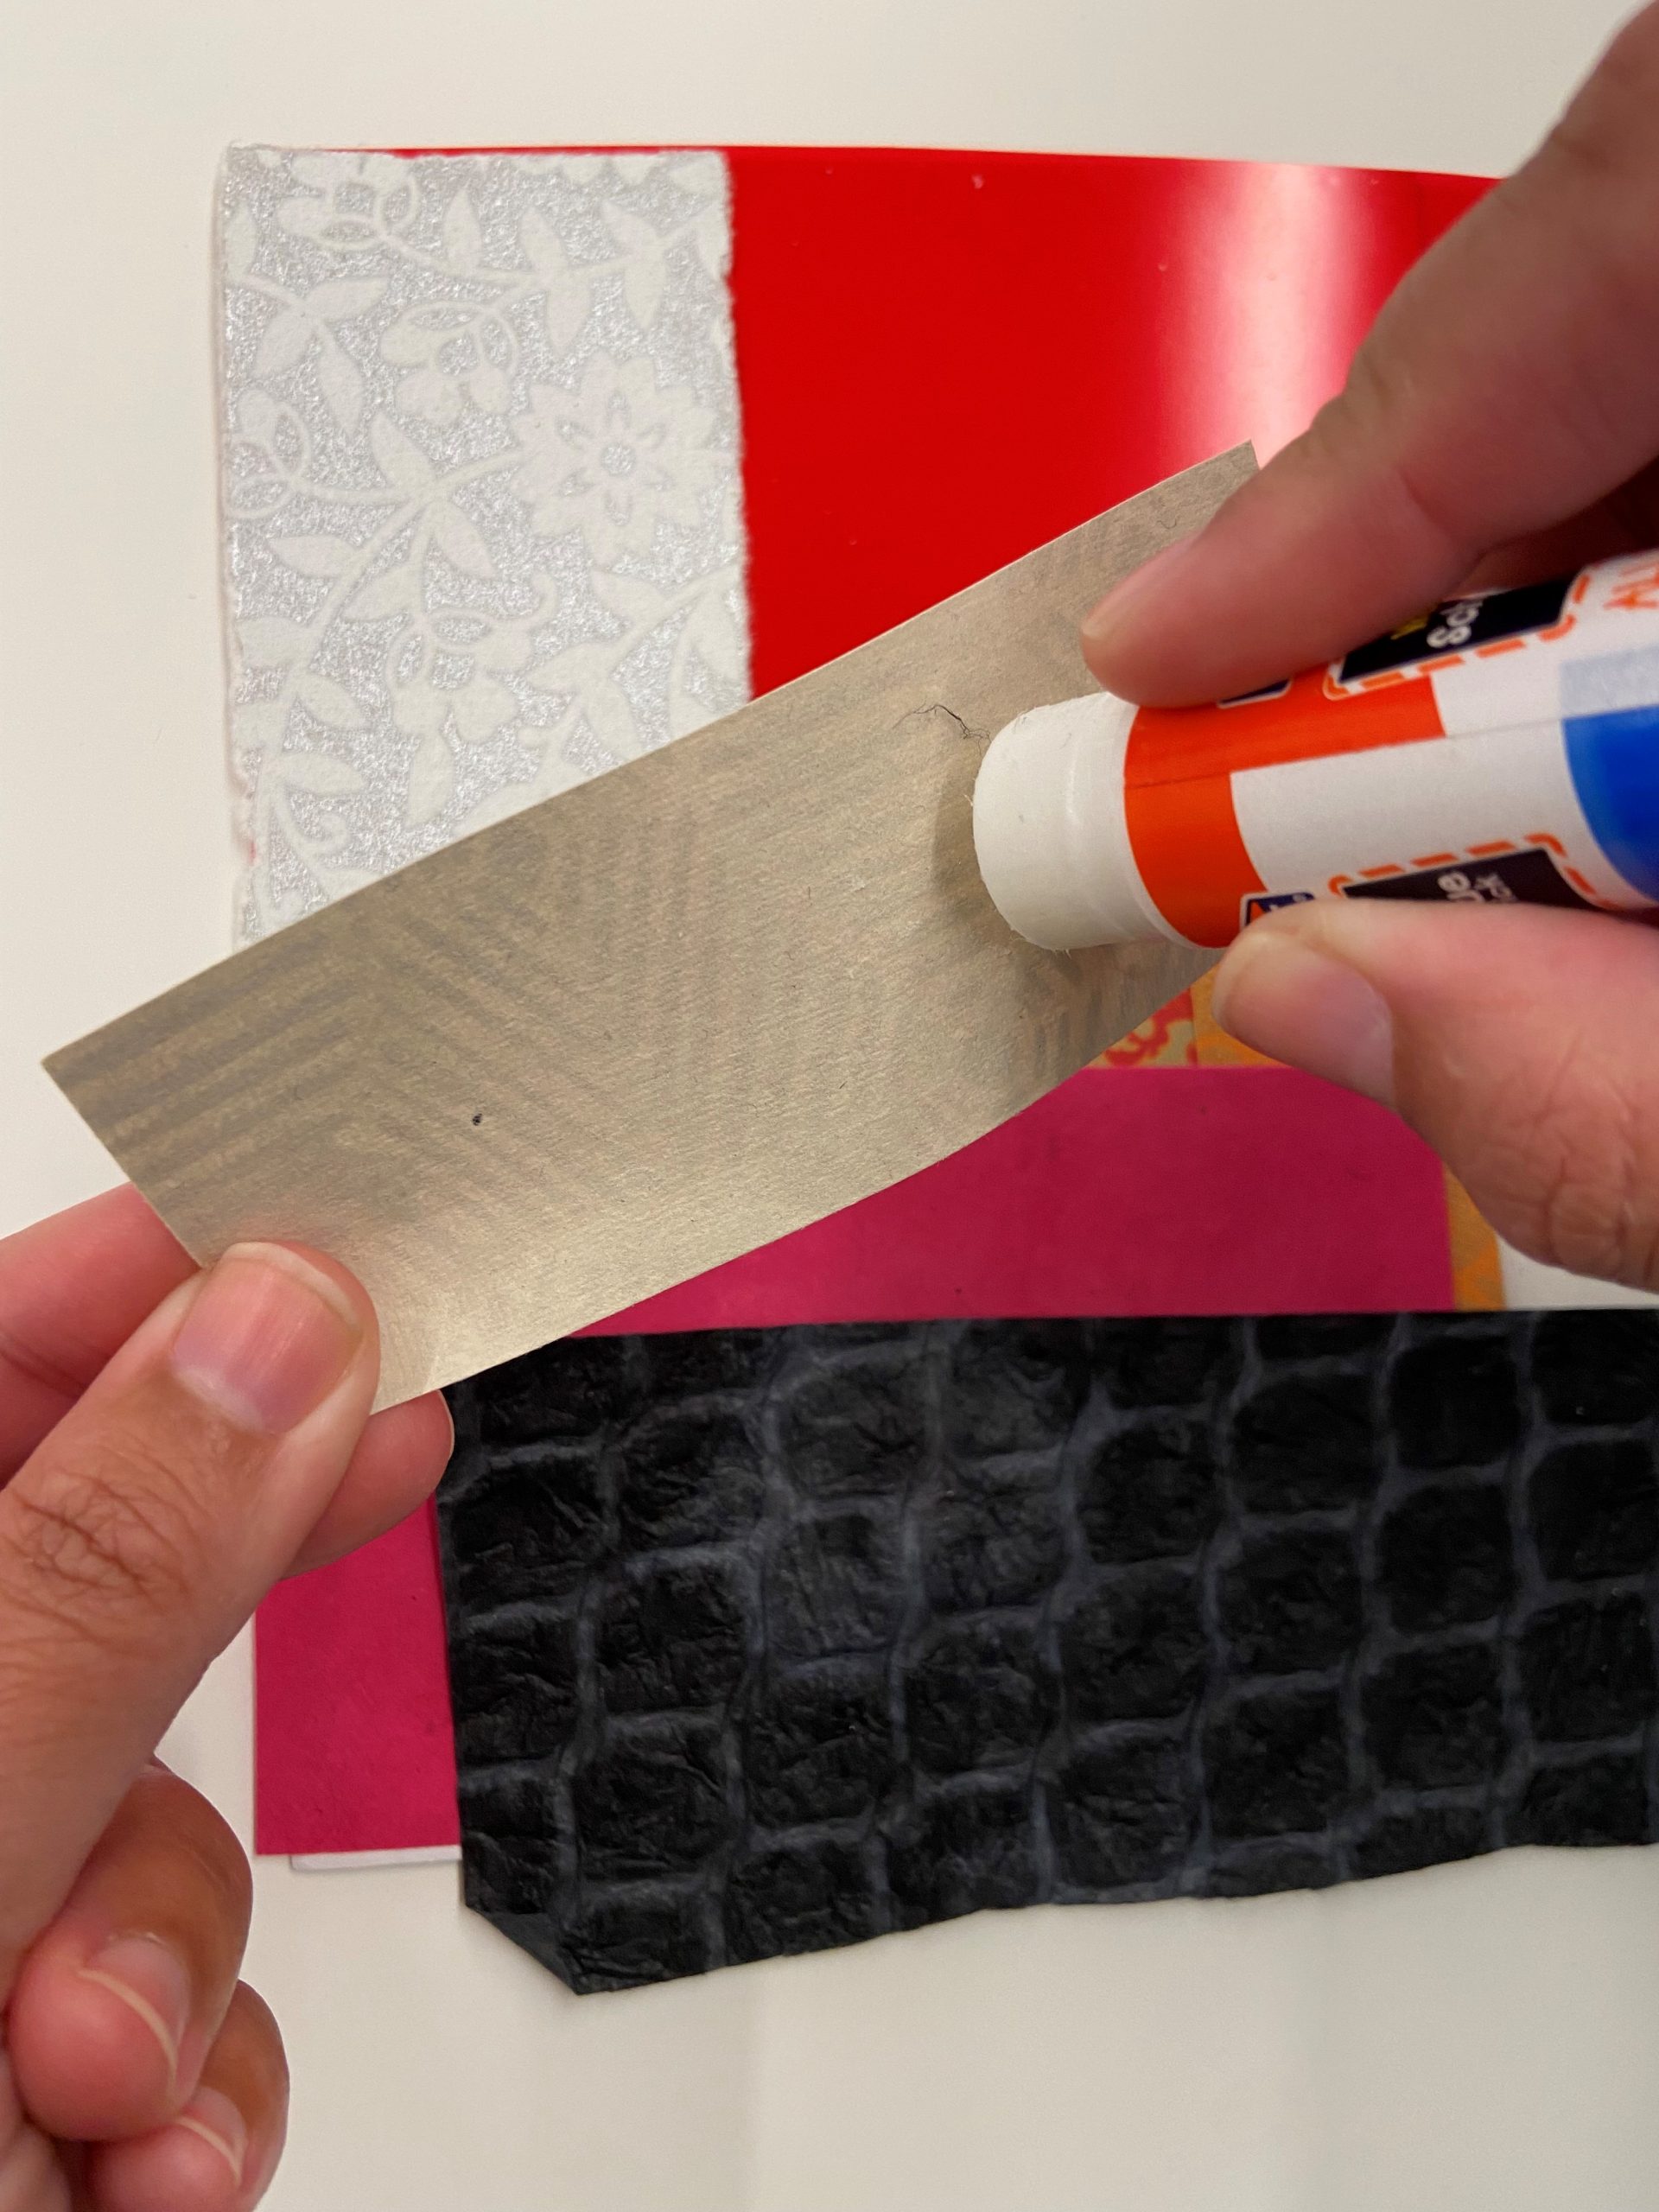
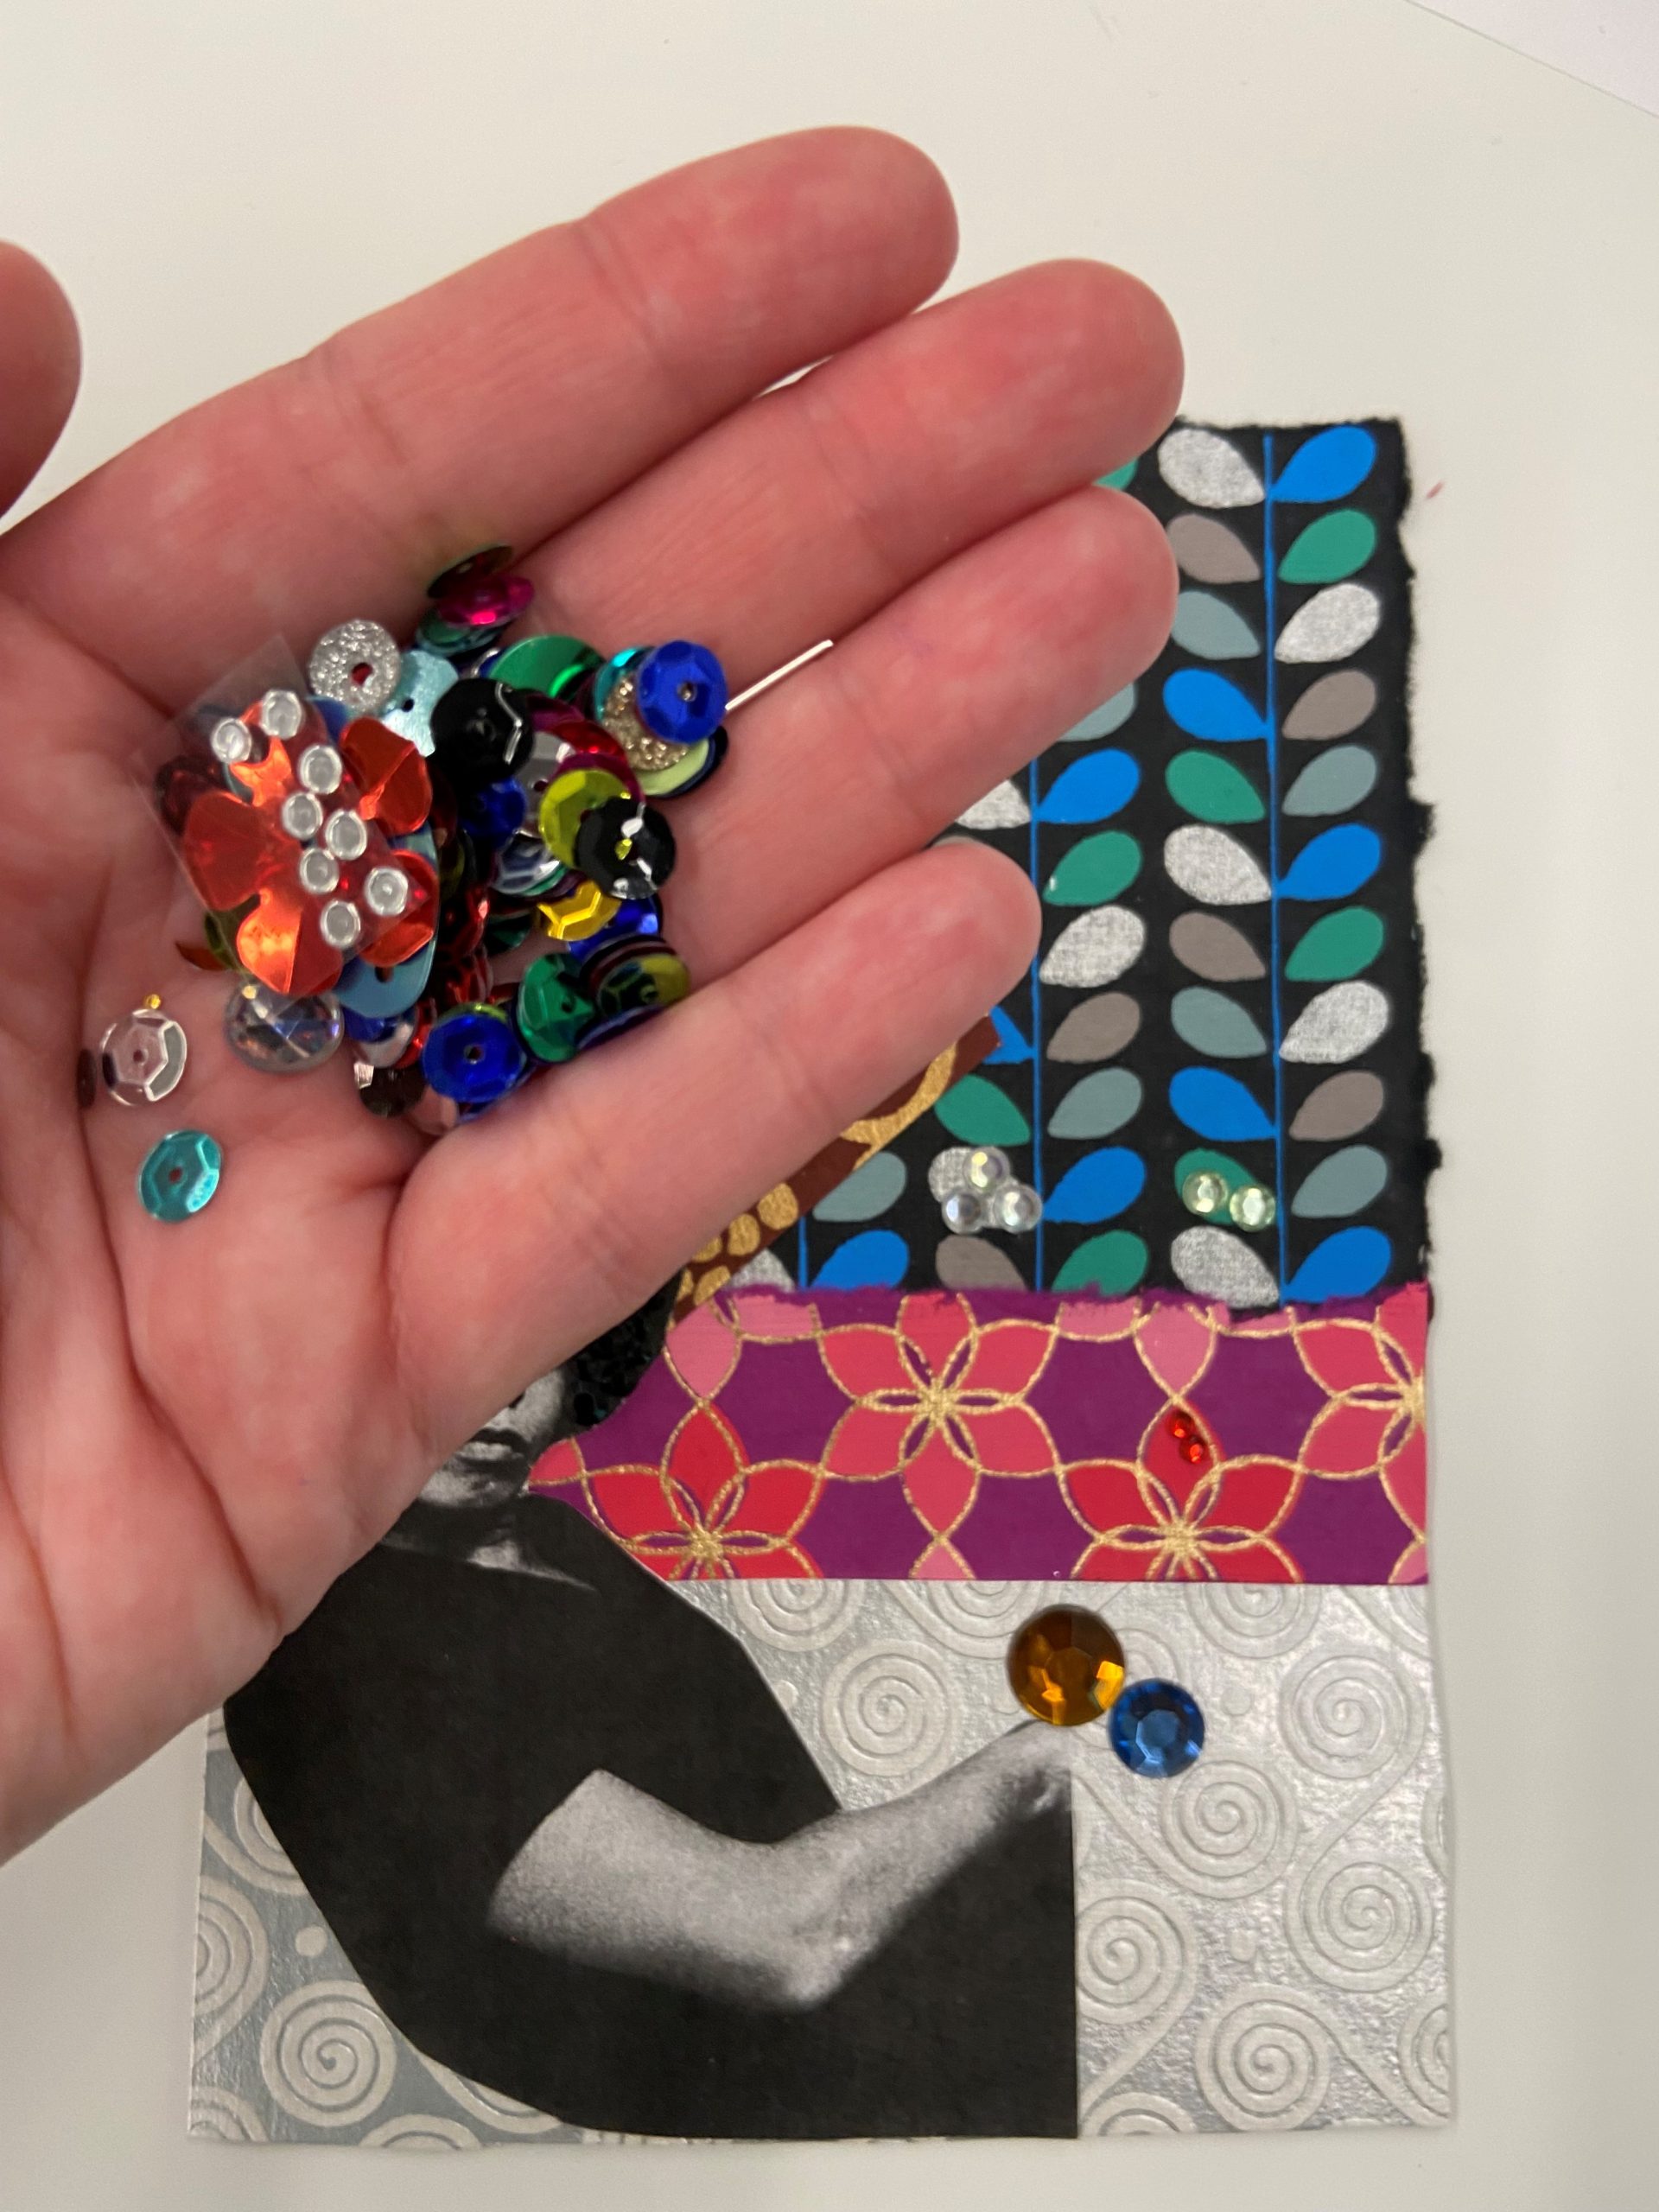
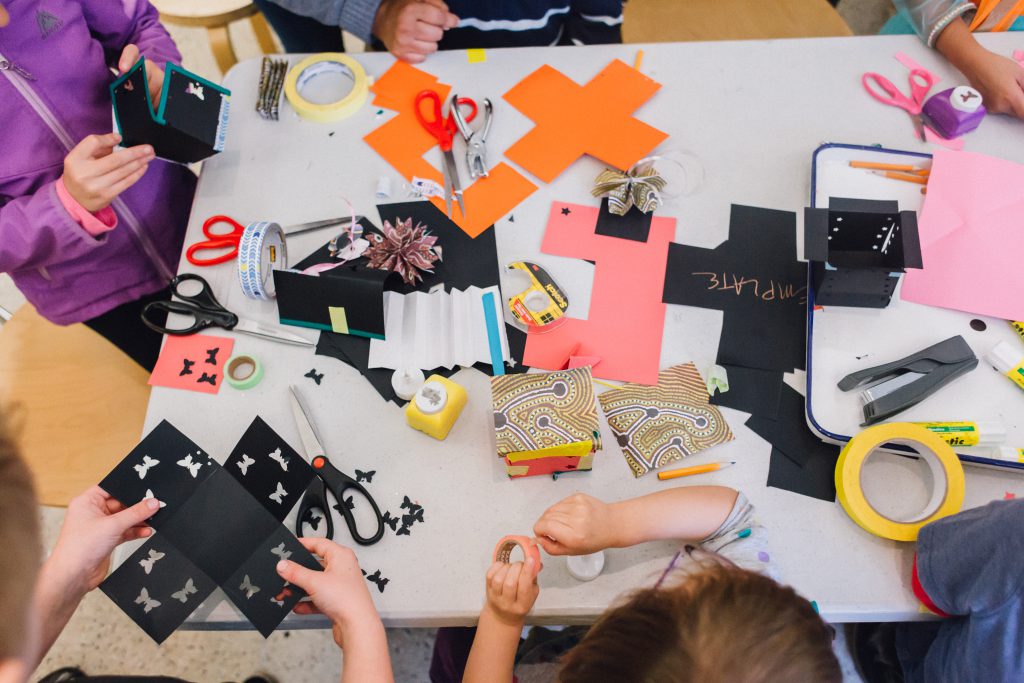
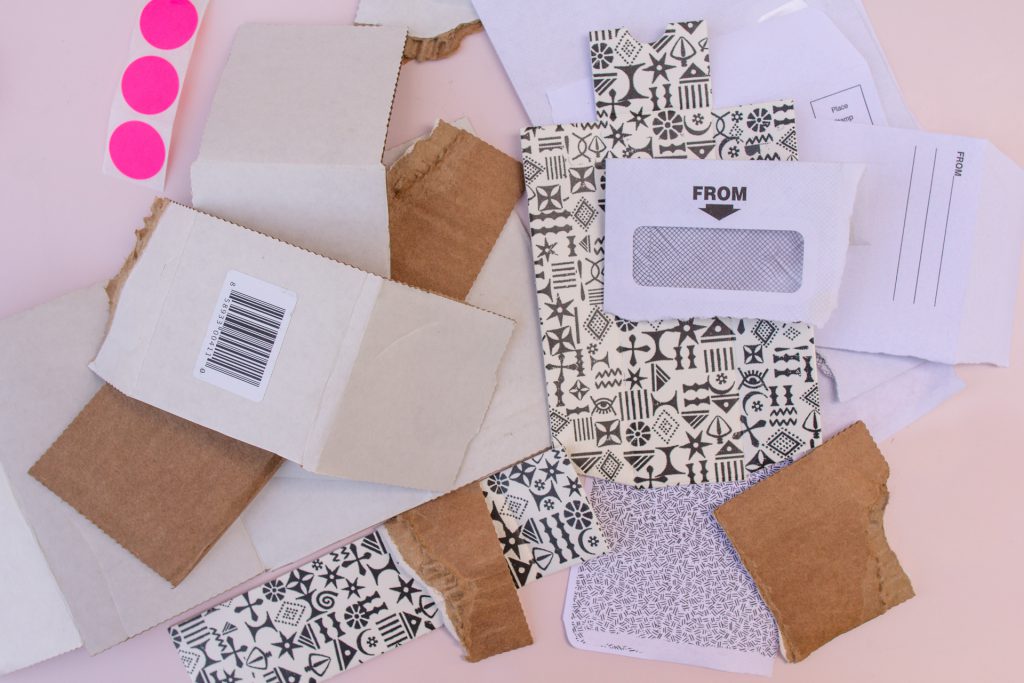
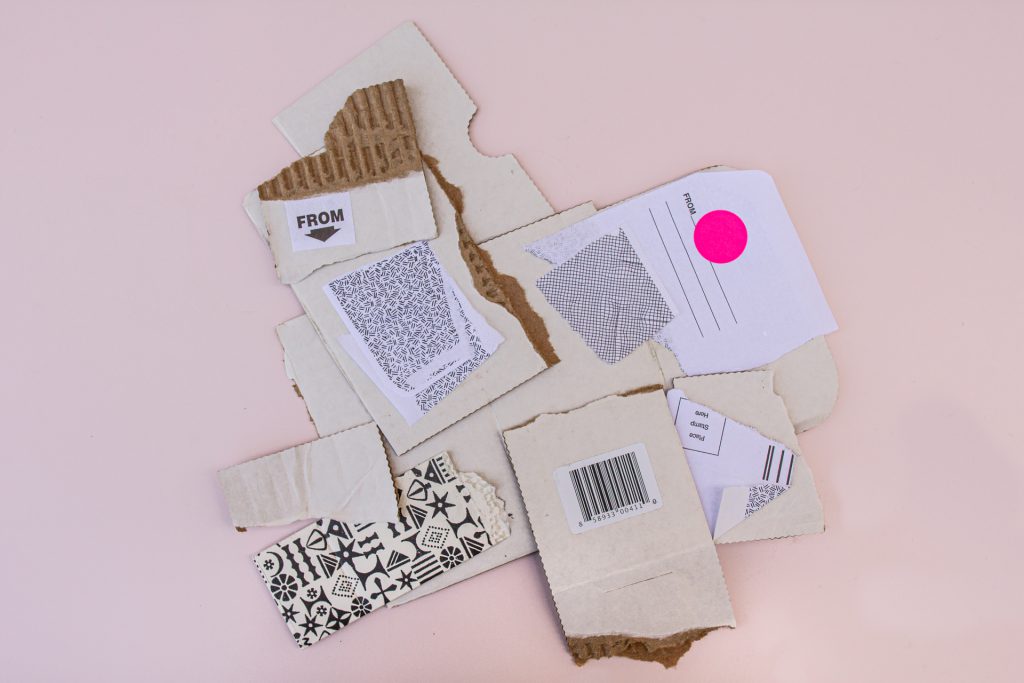
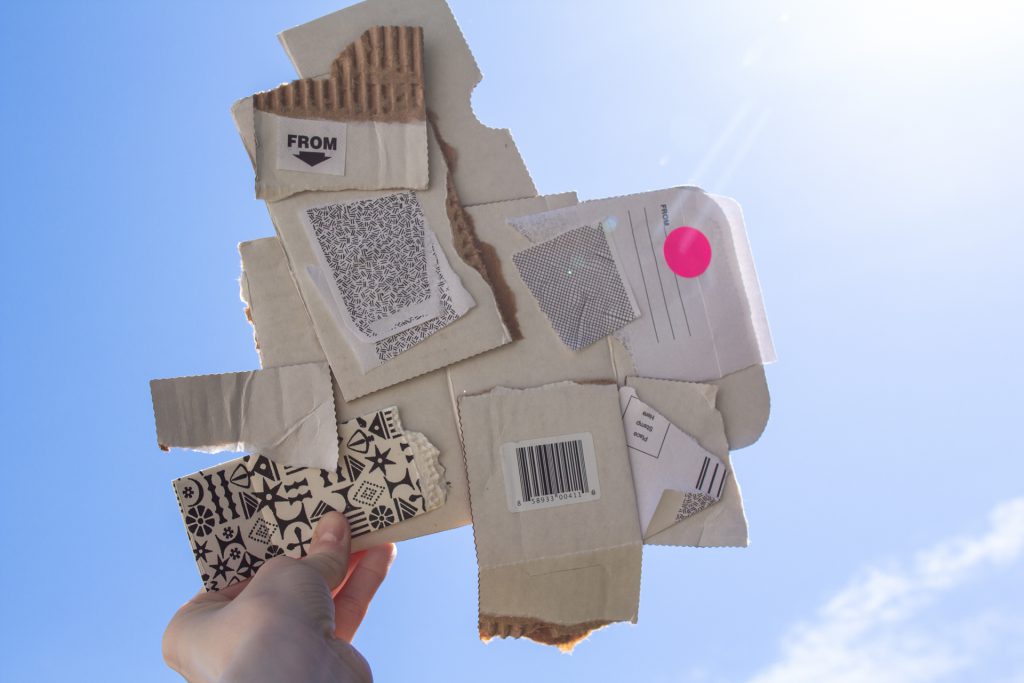
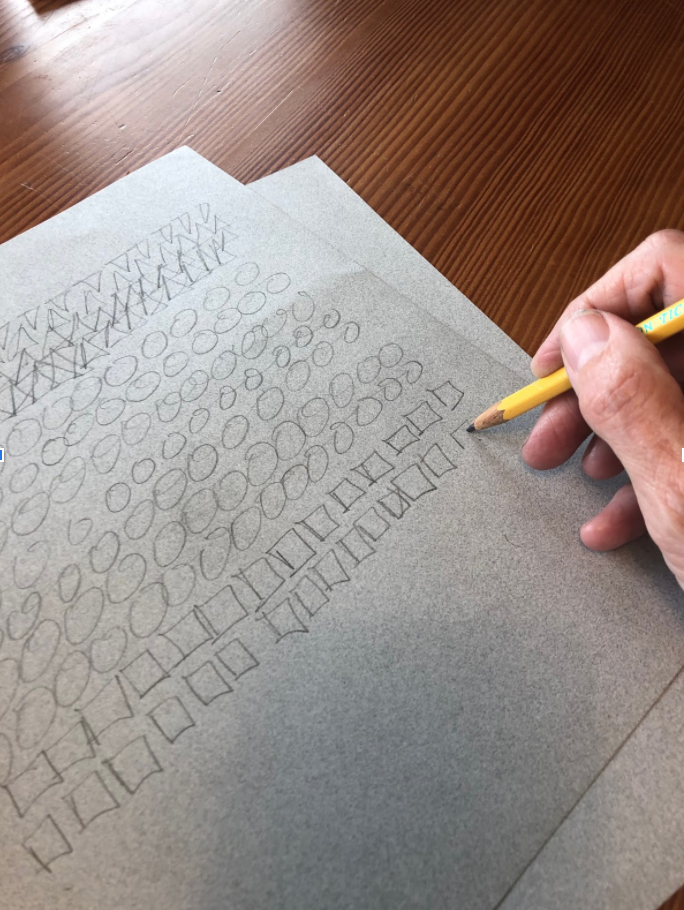
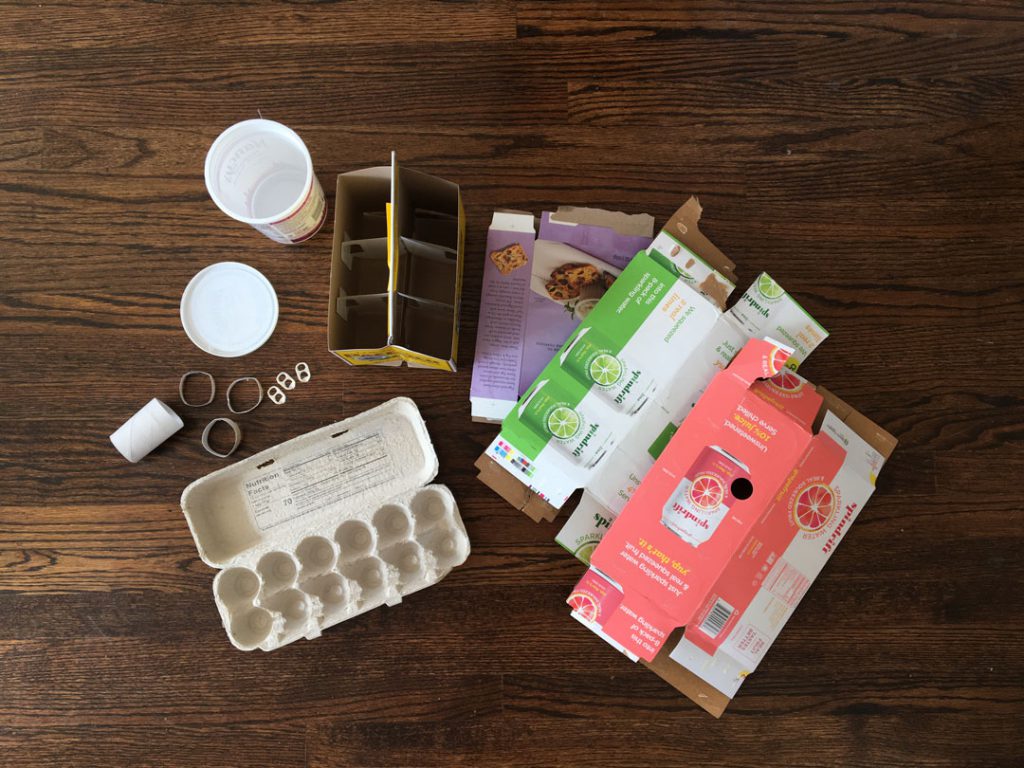
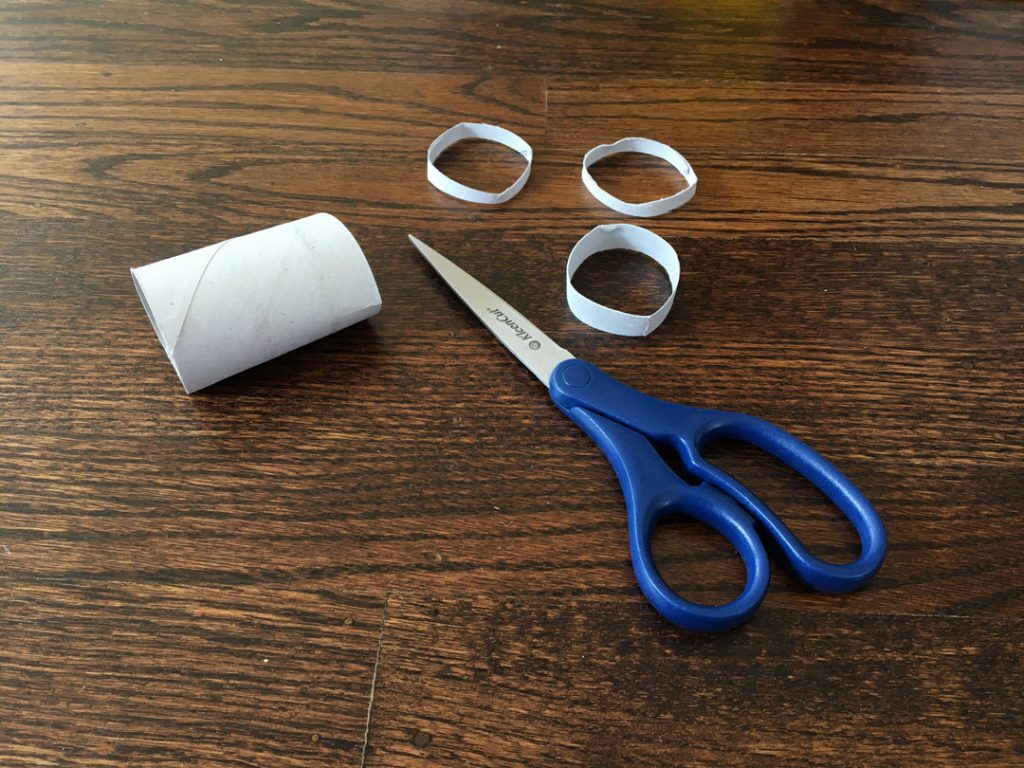
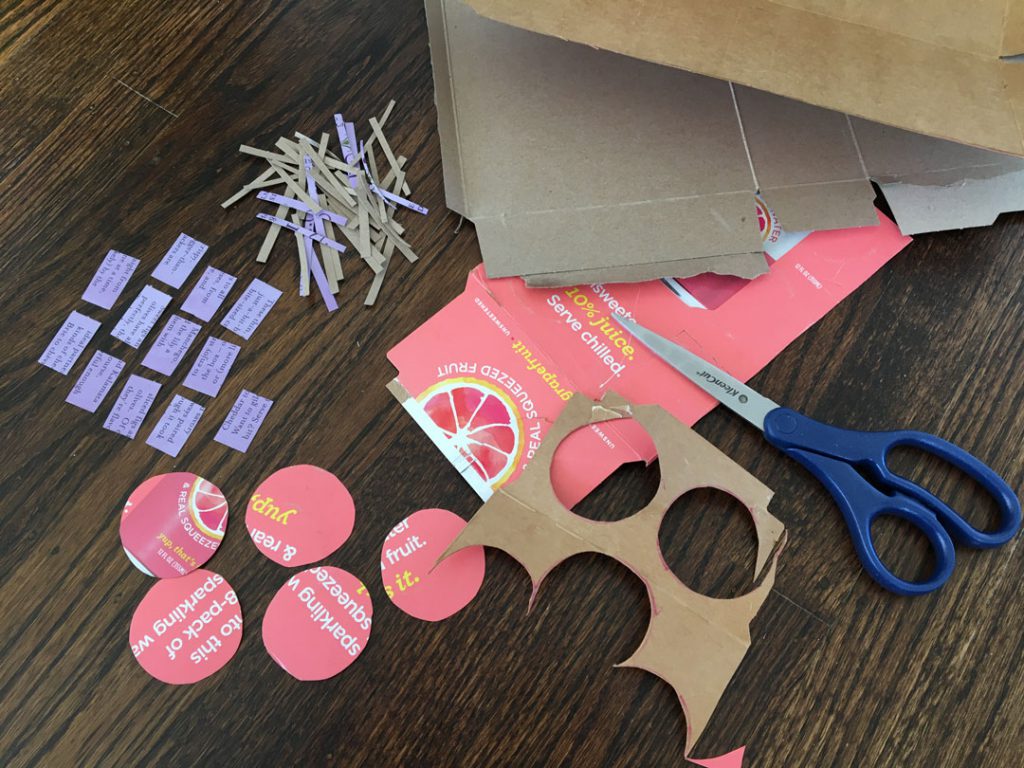
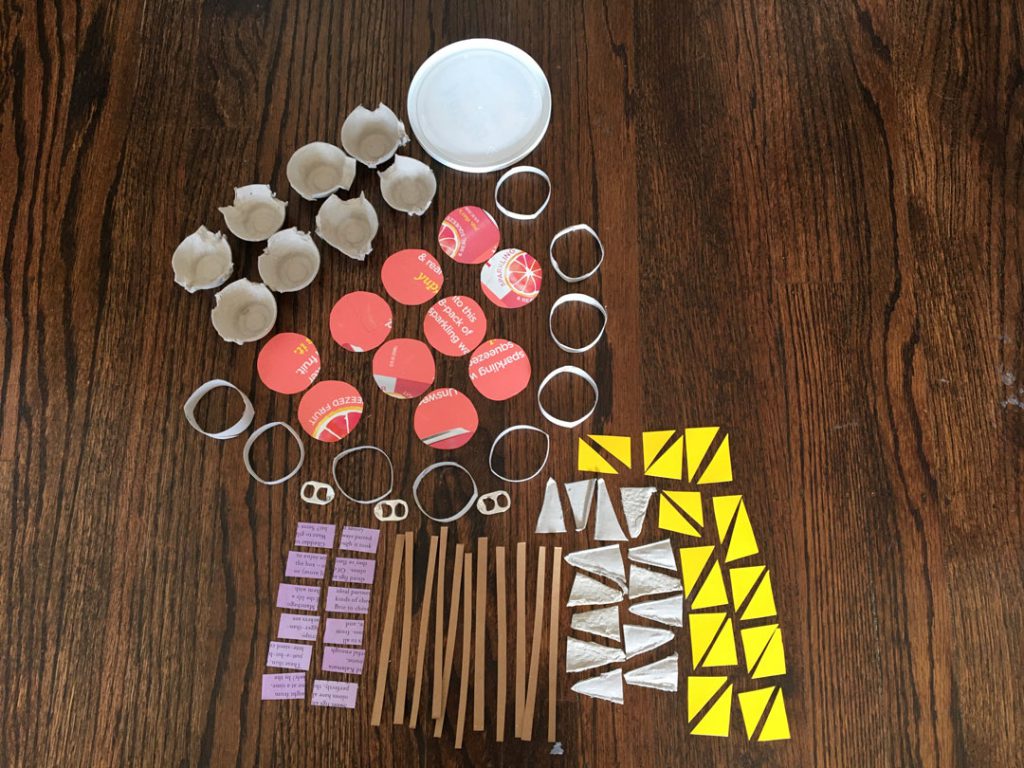
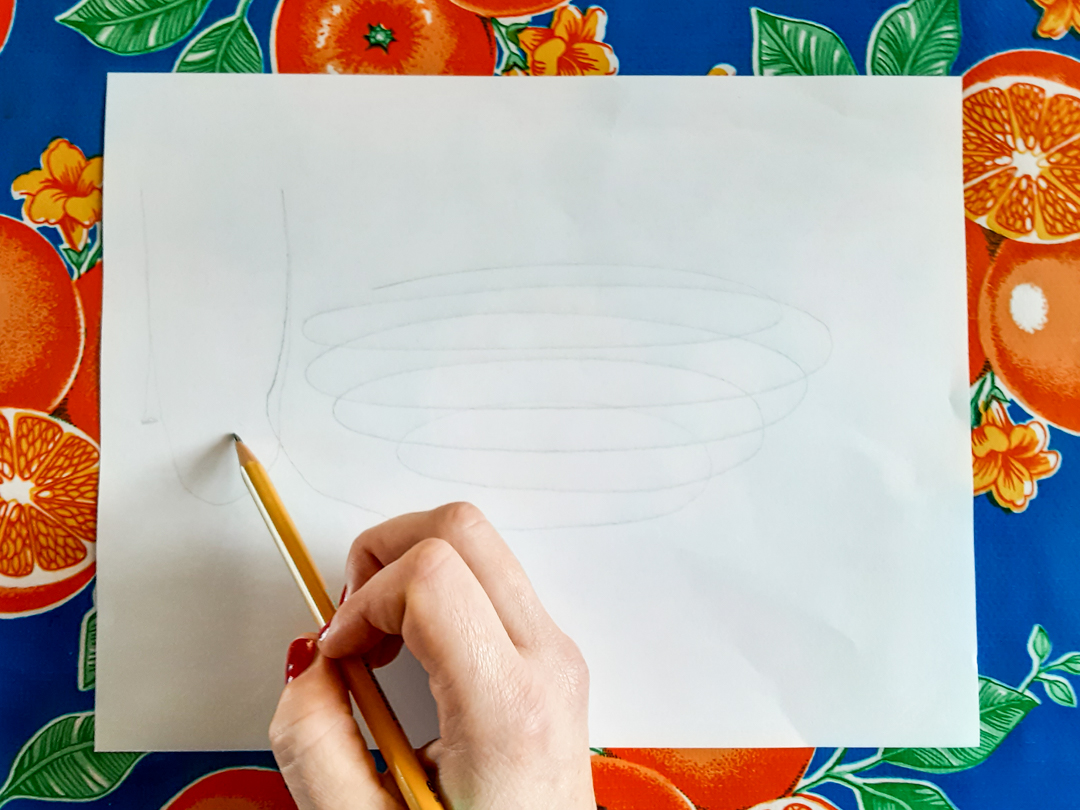
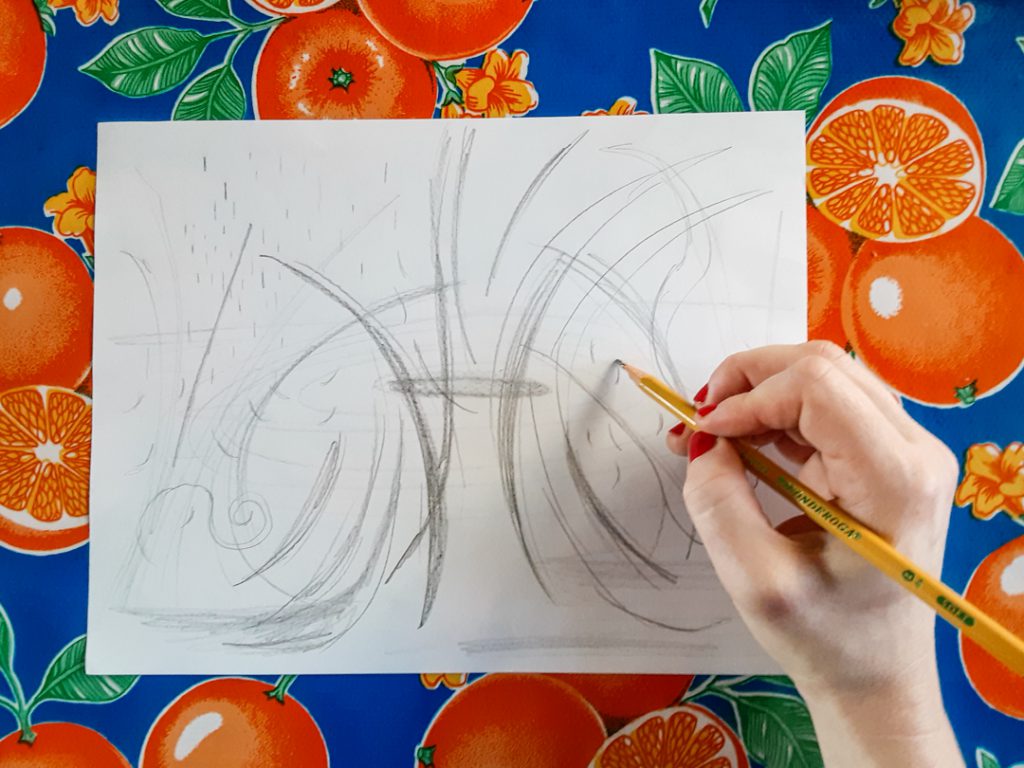
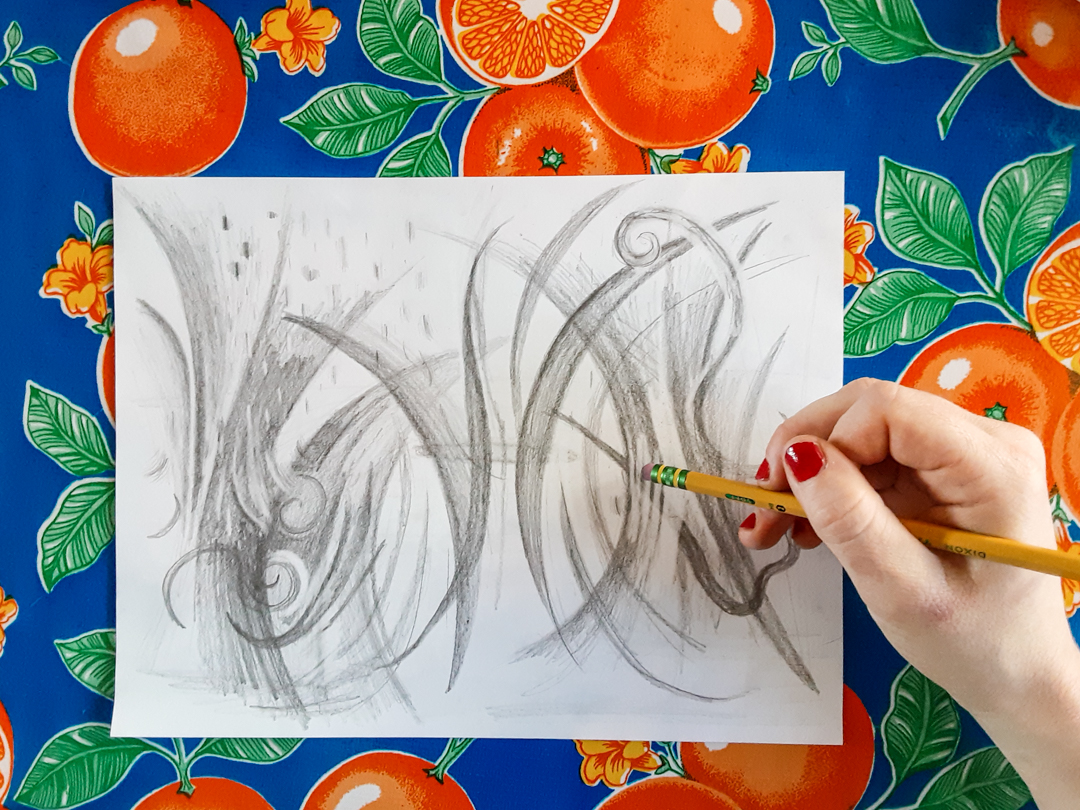
Inspired by Mickalene Thomas’s style, SAM Education staff has crafted Sparkling Icons, an art activity for participants of all ages. Using images of noteworthy LGBTQIA+ artists and activists, visitors will create collages with patterned papers and rhinestones that venerate the beauty and individuality of some of our most beloved legends. We wanted to highlight individuals that have paved the way for social justice and equality and have helped build a supportive community for future generations. 

Art museums, as cultural institutions, have the responsibility to promote inclusivity and highlight the work of artists in a way that provides art historical context but also shares the truth about their lived experiences. By participating in Pride Month, we want to demonstrate that SAM’s museum spaces are ones that are welcoming to queer self-expression and points of view (and not just during June!). Plus, who doesn’t want to come and play with glitter and rhinestones?! Hope to see you up at Volunteer Park on June 3, looking sparkly and iconic! 

Can’t make it to Pride in the Park? Check out the Sparkling Icons art activity and try it on your own time.

– Nicole Henao, SAM Manager of Youth and Family Programs

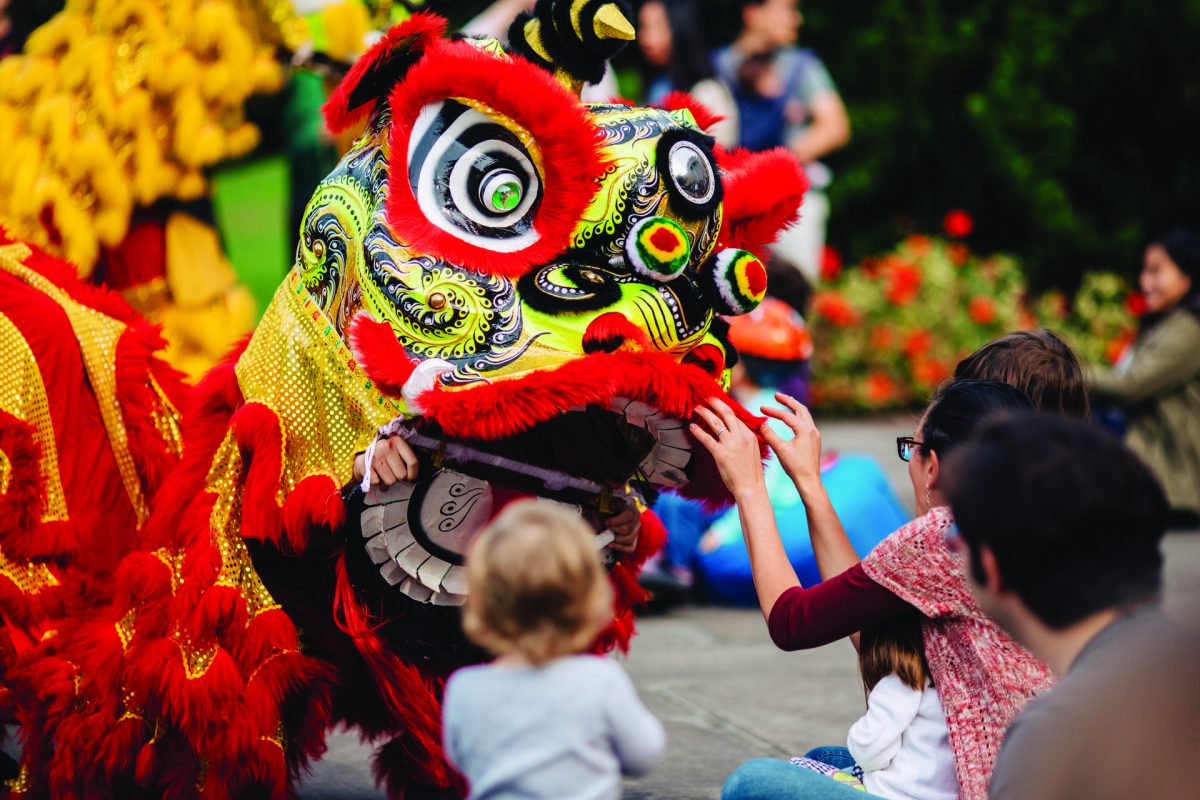
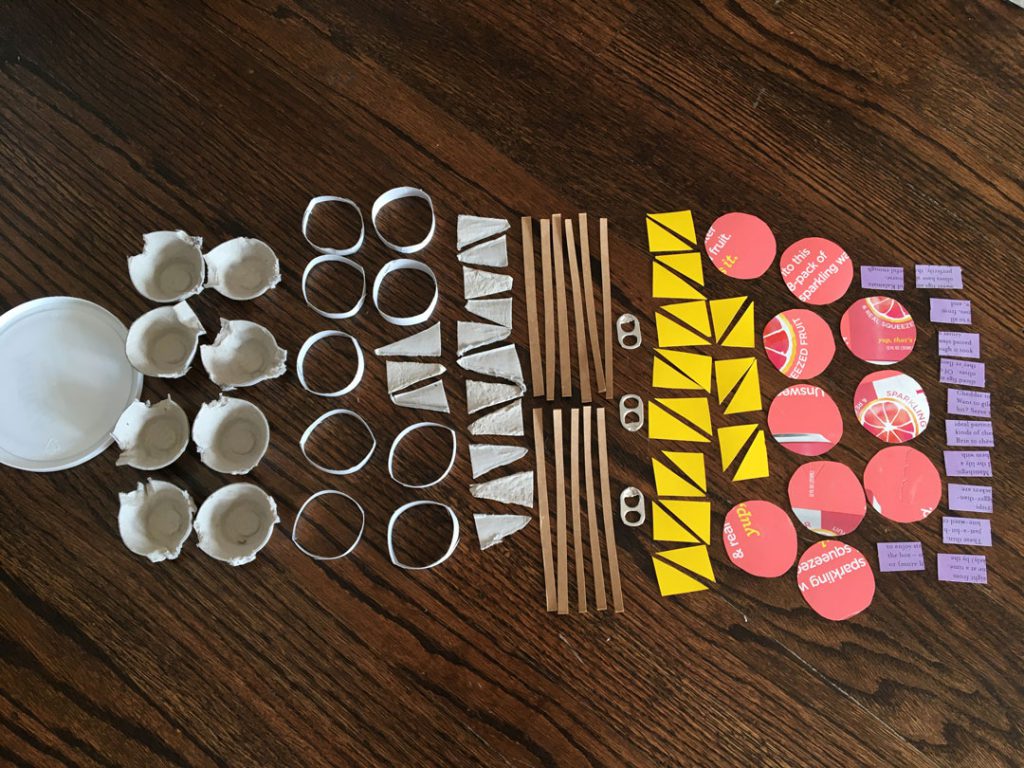
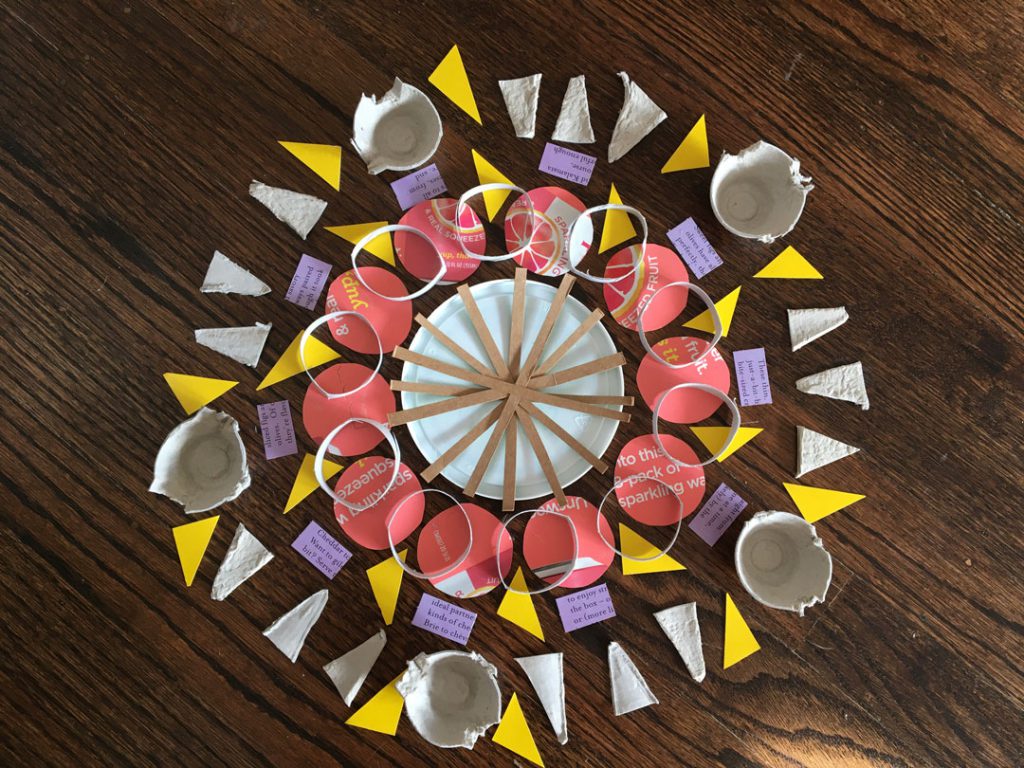
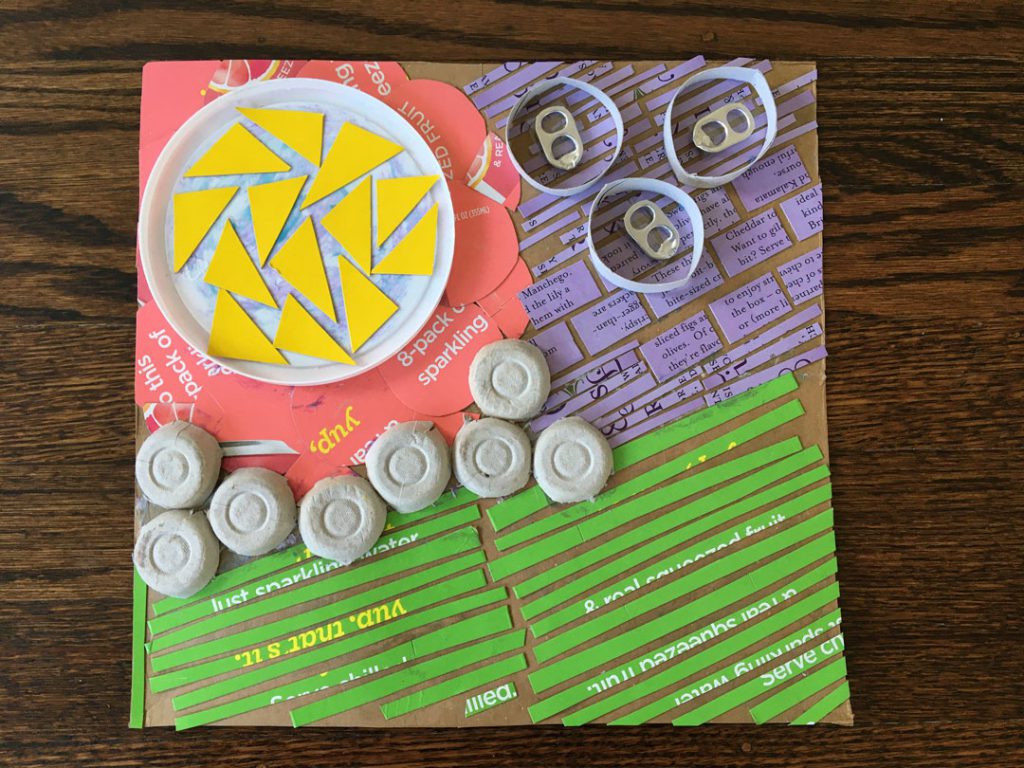
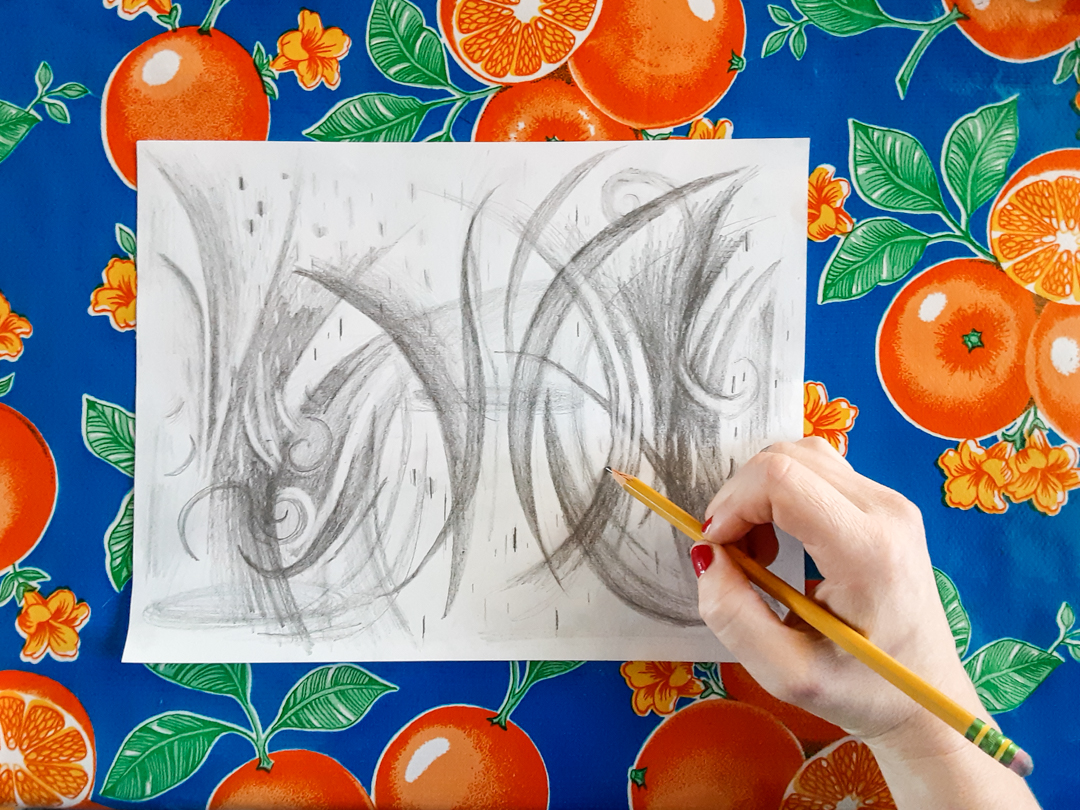
Photos: Chloe Collyer & Nicole Henao.

Asian Art Activity: Palampore

Inspired by a 19th-century Palampore, or bed covering, from SAM’s Asian art collection, teaching artist Amina Quraishi leads an art activity focused on shapes, patterns, and symmetry. With just a pencil, eraser, tracing paper, and a sheet of construction paper—and a few other optional art materials—Amina offers a tutorial on pattern building and repetition. Drawing from childhood memories of traveling to India and henna patterns applied to her hands in celebration of Eid al-Fitr, Amina encourages artists to think about meaningful objects and symbols in their culture. How can these be incorporated into the work?

Take a closer look at this Palampore and compare it to a contemporary work by artist Faig Ahmed by watching SAM’s Asian Art Spotlight: Oiling & Palampore video. And, find more educational videos of works on view at the Seattle Asian Art Museum in our Eyes on Asia Youtube playlist.

The Seattle Asian Art Museum is open, though school tours are not available at this time. SAM continues to connect art lovers of all ages to our rich collection of art through a variety of virtual experiences which align with Washington State learning standards in Visual Art and English Language Arts. The Eyes on Asia video series is designed to be used as a supplemental learning tool in virtual classrooms, at home by parents and caregivers, and by friends hanging out online. Once you’ve watched the videos in the playlist, visit the museum to see the featured artworks in person!

Photo: Amina Quraishi

Dance, Mudras, and Movement in Asian Art

The Seattle Asian Art Museum is open again and events continue to be virtual for the time being—so tune in to get creative and find inspiration through artworks and performances from across Asian cultures before your next visit to the museum! Learn about the different ways that Asian art can connect to dance and music with a performance by Hengda Dance Academy. Consider how body movement informs Asian art as we practice a variety of mudras based on sculptures at the Seattle Asian Art Museum. Then create your own work of art inspired by movement, rhythm, and more with painter and printmaker Janet Fagan.

Family festivals at the Seattle Asian Art Museum connect families with performances, art activities, and other programming related to SAM’s Asian art collection.

Kinetic Sculpture Inspired by Mark di Suvero

Create your own kinetic sculpture! Tune in to an art activity demonstration lead by teaching artist Romson Regarde Bustillo that takes cues from Mark di Suvero’s “Schubert Sonata” at the Olympic Sculpture Park. Follow along and think about how music impacts you as you get creative from your home.

The sculpture “Schubert Sonata”is a piece of moving art, which is also called kinetic art. The top part of the sculpture moves in the wind, while the tall pole holds the sculpture up and keeps it in the same place. Di Suvero has been interested in exploring movement in sculpture and has a strong interest in music. The title of this artwork refers to a piece of music written to be played on a piano. The artist formed curves, lines, and shapes out of metal while thinking of this music.

When you visit the Olympic Sculpture Park on the weekends, be sure to swing by the South Terrace to pick up a Park Pack, a tote bag which includes an activity to learn about kinetic art at the Olympic Sculpture Park. These Park Packs include sketching supplies and a family-focused activity lesson focused on movement, also inspired by “Schubert Sonata.” While you’re at the park, get inspired and start sketching. Park Packs are set out on Saturdays and Sundays and are available on a first come, first served basis. Free and open to the public.

Lunar New Year: Celebrating the Year of the Ox

Family festivals at the Seattle Asian Art Museum connect families with performances, art activities, and other programming related to SAM’s Asian art collection. While our Asian Art Museum remains closed, families at home can make art and learn more about Asian art, as well as our wonderful community partners.

Lunar New Year typically falls sometime between January 21 and February 20 each year. The holiday, which marks the first new moon of the lunisolar calendar, is celebrated in many places throughout Asia and in Seattle. In past years, SAM has celebrated Lunar New Year with families at the Seattle Asian Art Museum in February. The event has featured performances from Hengda Dance Academy, Mak Fai Kung Fu & Lion Dance Team, Junhong Kung Fu Club, and more. In addition to these performances, Seattle-based teaching artists have led original art activities for attendees throughout the day.

Although we won’t be celebrating at the Seattle Asian Art Museum in person this year, we’re excited to present a video from Ray Yang, one of our past Lunar New Year Family Festival teaching artists, that leads families through an activity at home. Thanks to a grant from the Freeman Foundation, SAM is able to provide a limited amount of art kits to families completing this activity at home! If you would like to receive a free art kit in the mail, please send your name and mailing address with the subject line “Lunar New Year” to FamilyPrograms@seattleartmuseum.org by February 28, 2021.

ART ACTIVITY: THE GREAT RACE AND COMICS

For ages 6-10+

About the Chinese Zodiac

The Year of the Ox began yesterday, February 12. The ox is one of twelve animals in the Chinese zodiac. Ever wonder how the order of the animals in the Chinese zodiac were determined? One of the most popular legends relates the tale of a great race decreed by the Jade Emperor to decide the order of the animals. Learn a bit more about the race and how to draw three of the animals in the race: the ox, the rat, and the tiger, the first three animals in the cycle. We will then create a story with the three of them as a comic strip! The great race is an important part of Chinese history, and understanding the story and how it shapes the zodiac is important. But it’s also fun to create stories that play with different outcomes or paths that the characters could have taken. That’s what we can do as artists today.

Materials

  • Paper
  • Pencil
  • Extension: Construction paper, scissors, glue stick, markers, googly eyes.

Steps

To create our comic, we will use a few important comic concepts: Characters, Panels, Setting, Dialogue, and Action!

  1. Characters: Begin by drawing the ox. Next up is the rat. And finally the tiger! Now that you’ve got the three characters down, show them in a series of three panels as part of the race.
  2. Panels and setting: Comic artists use panels with borders to contain the action in their drawings — sometimes the action even breaks out of the panels! What setting do you put the characters in? Are they racing across a river like the great race story? Do they race through the streets of Seattle instead? Or on a race course?
  3. Dialogue: What about dialogue? That’s the words that the characters say to each other. Is there conversation between the animals? Comic artists often contain these words in word balloons! Draw some balloons for your dialogue!
  4. Action: And finally, what is the action that’s taking place? How do they end up as the first three finishers? Or maybe they finish in a different order in your race. You get to decide the story!

Extension: Create a paper ox, rat, and tiger out of paper! The process is similar to the creation of our drawings, except you will be creating these shapes with cut paper. You can then glue the cut shapes onto a background or setting to create a scene, or even move them around as paper doll type figures to act out different race outcomes.

– Yaoyao Liu, SAM Museum Educator

Photo: Jen Au

Lunchtime Artist Spotlight: Kristen Ramirez

Take a lunch break for a conversation and some art making with Kristen Ramirez, a Seattle-based interdisciplinary artist. Ramirez toggles between many media and practices and tends to use hard-edge geometric forms in her large-scale murals and public works. Ramirez’s work has a clear visual connection to artists like Anne Truit, Frank Stella, and Kenneth Noland, featured in SAM’s collections.

Want to make art with Kristen? Be ready with a piece of paper, blue tape (aka painters tape), and some mark-making tools (like markers, paint, or crayons). If you have scrap wood and old house paint, all the better.

About the artist

Ramirez is also an educator and arts administrator, championing aspiring artists and established artists alike. Ramirez has taught at the University of Washington, Edmonds Community College, Pratt Fine Arts Center, Path with Art, and Cornish College of the Arts. She currently manages public art projects for the City of Seattle’s Office of Arts & Culture and Seattle’s Department of Transportation (SDOT).

SAM Creates: Wishing You a Happy Diwali!

Family festivals at the Seattle Asian Art Museum connect families with performances, art activities, and other programming related to SAM’s Asian art collection. While our Asian Art Museum remains closed, families at home can make art and learn more about Asian art, as well as our wonderful community partners.

Diwali is the Indian festival of lights, celebrated by many people throughout South Asia, as well as in Seattle. For the past 10 years, in collaboration with our community partner, Junior Asha, SAM has organized a Diwali celebration for families held at the Seattle Asian Art Museum each November. Junior Asha is the youth chapter of the Asha for Education – Seattle Chapter. Asha is a non-profit organization that is dedicated to bringing about socio-economic change in India primarily through education. In addition to raising funds for education, Junior Asha members also support the local community by volunteering at events such as the Diwali Family Festival at the Asian Art Museum. 

Free First Saturday, Diwali Family Festival, Asian Art Museum

Each year members of Junior Asha have dedicated their time to creating programming for the festival. This has included dance performances showcasing different types of Indian dance. Festivities performed by members of Junior Asha. One component that has remained constant across many celebrations is the youth and Tiny Tots fashion show led by Junior Asha. Members also spent time in the months leading up to the event learning about the art on view at the Seattle Asian Art Museum and working with SAM docents to create their own My Favorite Things tour of the museum. Members presented their tours at the Diwali Family Festival sharing their own unique opinions on artwork with the community. 

Although we won’t be gathering in person this year, we’re happy to highlight our incredible partnership with Junior Asha and to share an art activity from last year’s Diwali Family Festival for families to create at home. We’re looking forward to once again gathering together in celebration in the future.

Free First Saturday, Diwali Family Festival, Asian Art Museum

ART ACTIVITY: LUMINOUS LANTERNS

For ages 6-10+

Add a bit of color and light as you celebrate Diwali from home! Design and decorate a paper lantern with cutouts, tissue paper, and more. You can then place a light source inside when it gets dark out and see your creation come to life. 

What You’ll Need

  • Construction paper or cardstock 
  • Pencil
  • Scissors 
  • Tape or washi tape
  • Hole punch, push pin, or X-acto knife (optional, requires adult assistance)
  • Tissue paper (optional)
  • Markers (optional)
  • Tea light candle or flameless LED candle (optional)
  1. Cut a piece of square construction paper in the shape of a plus-sign, with four equal sides surrounding a square in the middle. If your piece of construction paper is rectangular, you can make it a square by folding over a corner and cutting off the extra paper on the bottom.
  2. The middle of the plus-sign will be the bottom of your lantern, so you can leave that alone for now. With pencil, sketch out a design or pattern on each of the other four sides that you can easily cut out or trace later. This can be inspired by something you see in your home or an artwork in the Asian Art Museum.
  3. Using scissors, a hole punch, push pins, or an X-acto knife, cut out or trace the design that you created. You can bend the sides of the paper over and cut out symmetrical shapes using scissors. Remember to have a grownup help you if you are using push pins or an X-acto knife. If you like, you can tape pieces of tissue paper over the cutouts to add different colors to your lantern.
  4. You can turn your plus-sign around and add decorative tape or other designs in marker. Once you have finished with what you want to cut out and add, fold the four sides of the plus-sign up to create a box without a top. You can add more decorations by cutting out and folding smaller pieces of paper, then taping them on the sides.
  5. Once you’re happy with your lantern, wait until the sun sets and place a light source inside. How do the colors and shapes change when there’s a light inside? During Diwali, people put up many lights to celebrate the special day. You can make even more lanterns in different colors, shapes, and sizes too!

KEEP LEARNING WITH A STORY

Learn more about the lights, food, and festivities of Diwali in the book Binny’s Diwali by Thrity Umirgar, illustrated by Nidhi Chanani. You can follow along with a read aloud of the book, check it out through the King County Library System, or purchase it from a bookseller.

Yaoyao Liu, SAM Museum Educator

Photos: Jen Au

SAM Creates: Inventions for Empathy

Look & Make Activities are designed as grade-specific lesson plans for remote learning. Find more information and artworks to inspire creative learning through these activities available for download on our website in English, Spanish, and Chinese.

This artwork is an installation created by the contemporary artist Saya Woolfalk. If you were to visit this work at the Seattle Art Museum, you could walk into this space and move, meditate, or just observe. Rhythmic music plays and a video of rotating leaves, eyes, hands, and patterns projects onto the wall and floor. The colors are mostly blues, greens, and purples. This  artwork is surrounded by a blend of cultures, symbols, ideas, experiences, and life forms and shows us what a better future for all living creatures might look and feel like. Hear from the artist in the video below as she discusses this installation when it was first exhibited as part of Disguise: Masks & Global African Art.

Woolfalk created this work to help fix a real world-wide issue: lack of empathy. Empathy is understanding how someone else is feeling because you have been in a similar situation or felt that way before. If you have ever felt sad because your friend was sad or excited because your friend was excited about something, you have felt empathy! You can show empathy for someone by thinking about their perspective. In this space, the three figures are called Empathics. The Empathics are imaginary alien beings that were transformed by fusing their cells with cells of animals and plants. The Empathics believe that the world would be a better place if more people were able to develop empathy for each other. It is their job to help guide this process.

LOOKING QUESTIONS

  • What’s going on in this artwork? What do you see that makes you say that? What more can you find?
  • If you were to put yourself in this work of art, where would you go? How would you want to move around? 
  • What do you think it would feel like to be there? What do you see that makes you feel that way?

ART ACTIVITY

Design and create a prototype for an invention that will help the Empathics spread empathy in the world. A prototype is a simple model that helps you test out your idea.

What You’ll Need

  • Paper
  • Pencil
  • Eraser
  • Cardboard
  • Scissors
  • Tape
  • Optional: markers, aluminum foil, wire, string, other available materials
  • If you prefer to draw in a computer program, you can design your invention on the PBS Kids Design Squad website.
  • Check out this video for tips on different ways to use cardboard.
  1. You have been chosen by the Empathics to create an invention that will help people have more empathy for others. They want this invention to be something that people can carry with them—either in their hand or on their body. Write down your task on a piece of paper!
  1. Imagine: Write about and/or draw at least 3 possible inventions. Circle your favorite one.
  1. Plan: Create a detailed drawing of your favorite invention. Give it a title, label each part of your invention, and write notes about how it will help spread empathy.
  1. Create: Use cardboard, scissors, and tape to create a prototype of your invention. Create this prototype to-scale, or the same size that you want your invention to be.
  1. (Optional) Add decorations or designs to your prototype. You can even add sound if you want! Think about all of the visual and sound elements that Saya Woolfak uses in her artwork to spread the message of empathy.
  1. When you’re done, share your prototype with a friend, family member, or teacher. Describe your task and tell them how your invention works. What do they particularly like about your invention? Do they have any ideas on how to make it even better?
  1. You can refine your idea and create new versions of your invention to share with people you know. What do they think about when they use your invention? Does it change how they think about other people?

KEEP LEARNING WITH A STORY

Read a classic book about empathy in a new form by borrowing the e-book graphic novel adaptation of A Wrinkle in Time, by Madeleine L’Engle (original story) and Hope Larson (graphic novel adaptation) from King County or Seattle Public Library. Or listen to the audio book version of Shuri: A Black Panther Novel #1, by Nic Stone and be inspired by Shuro as she uses her science and technology skills to create a better future for her homeland of Wakanda.

CHIMATEK: VIRTUAL CHIMERIC SPACE (Installation View), 2015–16, Saya Woolfalk, American, born 1979. Multi-media installation, 15 x 25 x 5 ft. Projection: 3:59 minutes, Purchased with funds from Josef Vascovitz and Lisa Goodman, Alida and Christopher Latham, and the Bill and Melinda Gates Foundation Art Acquisition Fund, 2017.16 Provenance: The artist; [Leslie Tonkonow Artworks + Projects]; acquired March 15, 2017. Photo: Nathaniel Willson.

SAM Creates: Poetry Inspired by Calligraphy

This art activity is part of SAM’s Look & Make Activities designed as grade-specific lesson plans for remote learning. Find more information and artworks to inspire creative learning through these activities available for download on our website in English, Spanish, and Chinese.

A Branch of the Cold Season includes both calligraphy and an image of a plum tree painted in ink. For hundreds of years, artists have practiced calligraphy, a type of decorative handwriting made with a brush or pen. Calligraphy can be a work of art on its own or it can go along with painted images. Even if someone cannot read what is written, they can enjoy calligraphy by thinking about its movement or style. The lines of calligraphy above the branches in this artwork were written by a monk, a member of a religious community. The monk’s name was Zhen. The painted plum tree was later added by the artist Yang Hui. Yang Hui gave this artwork as a gift to his friend, who was preparing to travel to a city far away. The Chinese characters, or written symbols, read: “When the plum blossoms begin to bloom. Imagine some of these nights you will be thinking of each other in the bright moonlight.” The image of a moon represents friendship and this work of art connected these two friends wherever they went. How do you stay connected to your family and friends who are far away? 

LOOKING QUESTIONS

  • What is going on in this painting? What do you see that makes you say that?
  • In this artwork, one artist wrote the words and one artist painted the image. Why do you think they were put together? How would it be different if it was just words or just the image?
  • This is a painting of a plum blossom, which often blooms in February and March. In Chinese art, plum blossoms can be related to winter or the coming of spring. What season is it right now where you are? What plants, flowers, or other parts of nature do you see often? Which plants have meaning to you and your family?

MOVEMENT ACTIVITY

Go for a walk outside! As you are walking, look closely and notice the nature around you. What trees, flowers, plants, and animals do you see? As you observe them, notice how they move. Do they sway in the wind? Do they jump around? Move closer to what you see (at a safe and respectful distance, if it is an animal). What new details do you notice when you are close up to the plants and animals? Can you move like the branches of a tree? 

ART ACTIVITY: Make Nature-Inspired Artwork & Poetry with A Friend!

What You’ll Need

  • Paper
  • Pencil
  1. Choose one of the plants or animals that you saw on your walk, or often see this season. Ask your family member or friend to do the same. 
  2. On a blank piece of paper, make a drawing of your plant or animal. You can look out your window or find a picture to draw from. You could also close your eyes, remember what it looks like, and draw from your imagination. Think about how it moves. Can you draw your plant or animal in motion?
  1. When you are finished, share your drawing with your partner. Then, switch drawings with them. 
  2. Look at your partner’s drawing and, on a separate piece of paper, create an acrostic poem with the name of the season you are in. To write an acrostic poem, you write one word up and down, then start with those letters for the beginning of the poem’s lines. Here’s an example using the “spring” as the first word: 

Sun is peeking out
Park bench
Rabbits and singing birds
I see it all
Now I move to the
Grass

  1. When you are happy with your poem, draw it into your partner’s drawing. You can put the lines wherever you want, they don’t all need to be together. Notice the style of your partner’s drawing. Is it cartoonish? Is it long and looping? Is it sharp and detailed? Try to write letters to go along with your partner’s drawing, as if the words are little drawings themselves. 
  2. Show your artwork and read your poems out loud to each other when you are done. 

KEEP LEARNING WITH A STORY

Learn about the seasons through haikus paired with clear scientific explanations in an animated read aloud of Our Seasons by Grace Lin using a free trial or join three friends as they go hiking in part one and part two of a video read aloud of The Hike by Allison Farrell.

Images: A Branch of the Cold Season, ca. 1440, Ming Dynasty (1368-1644), Yang Hui with Monk Zhen of Huan’an Temple, ink on paper, 30 5/16 x 56 1/16 in. (77 x 142.4cm), Eugene Fuller Memorial Collection, 51.132. Photo: Paul Macapia

SAM Creates: Comic Books with Michael Nicoll Yahgulanaas

Carpe Fin is a very large mural created by Haida artist Michael Nicoll Yahgulanaas on handmade mulberry paper from Japan. The people of the Haida Nation are native to coastal British Columbia and southern Alaska and have occupied Haida Gwaii since time immemorial. Yahgulanaas describes his artwork as “Haida manga,” which combines many artistic and cultural traditions and styles, including Haida formline art, Japanese manga, Pop Art, Chinese brush painting, and graphic novels. 

The artist uses black shapes to outline scenes from the story, which are similar to boxes you’d see in a comic book or graphic novel. The shapes Yahgulanaas uses, like ovoids and u-shapes, are usually used in formline or frameline design, which is the common visual language across Native communities in the Northwest Coastal region. He was inspired in particular by a 19th-century headdress created by his Haida relative, Albert Edward Edenshaw, pictured below. 

The story he tells is inspired by a traditional Haida oral story and the story told by his relatives’ artwork, but set in the world that we live in today. Carpe Fin is about the relationship between humans and the ocean. A sea mammal hunter goes in pursuit of food to feed his starving community and is taken underwater to the realm of a powerful spirit. Carpe Fin makes us think about environmental issues and the connection between humans and nature. Learn more about the history of the Haida Nation.

LOOKING QUESTIONS

Take a minute to look at the artwork and take in everything that you see. Then talk about these questions with a friend or family member.

  • What’s going on in this artwork? What do you see that makes you say that? What more can you find?
  • This panel is just one part of a much larger work of art and was inspired by comic book design. How is it similar to comics that you have seen before? How is it different?
  • Who do you think the characters are in this story? What can you tell about them based on the details you see?
  • Imagine you’re in one part of this painting. What would you see? What would you smell there? What would you hear?

Art Activity: Create a comic to tell your own story.

What You’ll Need!

  • Paper
  • Pencil
  • Eraser
  • Optional: ruler, markers, colored pencils
  1. Decide on a story: Choose an interesting story that has been told to you by someone you know. Now, think about what that story would be like if it happened today with people you know. When you have an idea for your story and characters, write out the plot: a beginning, middle, and end. 
  2. Divide your paper into three parts, either by folding it or drawing lines using the ruler and a marker. For more of a Haida manga style, try creating three boxes using ovoids or u-shapes instead of squares or rectangles.
  3. Working from right to left or top to bottom (depending on how you use your paper), draw the beginning, middle, and end of your story.
  4. If you like, you can trace your lines in marker and color in your drawings. You can also add words
    to your story (consider using speech bubbles to make it look even more like a comic strip)!
  5. Don’t forget to write your name, authors and
    artists always sign their work! What title will you give this comic?

KEEP LEARNING WITH A STORY

Michael Nicoll Yahgulanaas also turned Carpe Fin into a book. Buy a copy from SAM. You can read more graphic novels on Hoopla Digital and Comixology. If you’re looking for more new takes on Indigenous stories, read Tales from Big Spirit series by David Alexander Robinson or Trickster by Matt Dembicki online.

Carpe Fin (detail), 2018, Michael Nicoll Yahgulanaas, Haida, b. 1954, watercolor and ink on handmade Japanese paper, 6.5 x 19.7 ft., Seattle Art Museum, Ancient and Native American Art Acquisition Fund, McRae Foundation and Karen Jones, 2018.30, © Michael Nicoll Yahgulanaas. Sakíi.id (headdress frontlet), ca. 1870, Albert Edward Edenshaw, maple wood, paint, and abalone shell, 6 1/4 x 5 7/8 x 2 1/4 in., Gift of John H. Hauberg, 91.1.82. Photo: Natali Wiseman.

SAM Creates: Assemble Assemblages à la Rauschenberg

In his original Cardbirds, Robert Rauschenberg used discarded cardboard boxes he found on the street to create this flock of birds. Notice that he isn’t just using cardboard, but he rips the edges so the corrugation inside shows and the writing is prominently featured. These objects are supposed to feel like they were pulled out of a dumpster. By using everyday or discarded objects to make art, Rauschenberg was inviting us to rethink the value system of fine art.

Rauschenberg was an innovator, known for his works combining painting and sculpture called combines. This was a radical blending of materials and methods in the 1950s and 60s and expanded the traditional boundaries of art. Combines and assemblages are like collage but are three dimensional with found objects projecting out from the base.

Create your own assemblage

What you’ll need

  • Cardboard or other materials that can be ripped, torn, and reassembled (phone books, toothpicks, or other recycled materials like scrap wood)
  • Glue, stapler, paper clips, rubber bands
  • Scissors
  • Markers or paint
  • Pencil or pen

As a starting point go outside and observe birds or other creatures. Think about Rauschenberg’s title: Cardbirds. Base your creation on something you see outside.

Consider cutting up cardboard pieces in preparation so there is a large assortment of sizes and textures. Peel off the top layer over the corrugated cardboard to show its interesting texture.

Gather your materials and take some time to arrange them in different ways. Think about pattern and texture as you let the materials speak to you, they will have their own story. Leave the evidence of their previous life visible, notice how Rauschenberg used the existing words “Turkey” or “Frozen” stamped on the cardboard.  What history do your objects have? Can it help inform the work you’re making? 

Next, use simple shapes to represent the animal or object you saw outside. Try cutting out or ripping ovals, triangles, and rectangles as well as organic shapes.

As you assemble your work try using a variety of attachment techniques, slot cuts are the simplest: cut straight into two separate pieces and slot them into each other at opposite angles. Layer and stack pieces together thinking about the use of symmetry as well as asymmetry, to create unity and interest. Glue objects together and allow time to dry or set. Consider painting with gesso or clear acrylic to help unify the piece. 

Make a few versions of your object or invite a friend to collaborate. Collaboration was an ongoing practice for Rauschenberg who said, “Ideas are not real estate.”

 We would love to see the artwork you make while you #StayHomeWithSAM!

– Lynda Harwood-Swenson, SAM Assistant Manager for Studio Programs  

We are humbled by the generosity of our donors during this unique time. Your financial support powers SAM Blog and also sustains us until we can come together as a community and enjoy art in the galleries again. Thanks to a generous group of SAM trustees, all membership and gifts to SAM Fund will be matched up to $500,000 through June 30!

Images: Cardbird III, 1971, Robert Rauschenberg, collage of corrugated cardboard, tape, offset photolithograph, and screen print, 35 1/2 x 36 in., Gift of the Robert B. and Honey Dootson Collection, 81.62.2 © Robert Rauschenberg Foundation. Natali Wiseman.

SAM Creates: Dance Like Lynette Yiadom-Boakye Is Watching

Does this painting make you want to dance?! Artist Lynette Yiadom-Boakye paints her artworks, like this one, in a single day based on her memory or imagination. Its sense of movement may make you want to join in and move! Try to pose or stand like this figure. Make sure you have enough space. Is it hard to pose like this? How long can you hold this pose for? Below is a perspective on this artwork from choreographer Donal Byrd. Give it a listen as you think about the painting and also about dance as an art form. Then do some dancing yourself and see if you can sculpt a pose! Find a one-page lesson plan based on this artwork designed for grades K–2 and translated into English, Spanish, and Chinese in SAM’s Education Resource Center catalogue. There’s more where that came from—check out more Look and Make Lessons on our website!

Movement Activity: Freeze Dance

  • Pick one of your favorite songs and have a family member or friend begin playing it. Dance around to the music! Move all parts of your body from your fingers to your toes.
  • Have your family member or friend press pause randomly to surprise you!
  • When the music stops, freeze! You’ve just struck a pose! Hold it until the music starts playing again. 
  • Press play on the music and pause again when you’re ready to strike another pose. This time try something different.
  • Repeat!

Art Actvity: Create a sculpture of a person out of aluminum foil!

Materials

  • Aluminum foil
  • Scissors
  1. Cut slits in the foil: One on the bottom for the legs and two at the top for the head and arms.
  2. Squeeze the middle of the foil to make the waist.
  3. Squeeze each leg and arm to make more of a cylinder shape.
  4. Crunch in the foil on top to make a head.

When you’re done, shape it into the pose of your favorite dance move! Remember how it feels to move like this every time you look at it!

Keep Learning with A Story

Watch I Got the Rhythm by Connie Schofield-Morrison or Hip Hop Lollipop, by Susan McElroy Montanari read aloud. These picture books are about a young girls who are moved by rhythm and dance.

– Lindsay Huse Kestin, SAM Assistant Manager for Kids and Family Programs, Yaoyao Liu, SAM Museum Educator & Lauren Kent, SAM’s Museum Educator for School Programs & Partnerships

Trapsprung, 2013, Lynette Yiadom-Boakye, oil on canvas, 78 3/4 x 70 7/8 in. (200×180 cm). General Acquisition Fund, 2014.11 © Lynette Yiadom-Boakye. Courtesy of the artist and Jack Shainman Gallery, New York and Corvi-Mora, London. photo: Elizabeth Mann.

SAM Creates: Rubbings Revealed from Wu Liang Shrine

Located in present-day Jiaxiang in Shandong province, the Wu Family Ancestral Shrine built during the 2nd century in the Eastern Han dynasty (25–220) is among the best-known works in Chinese art history. Take a virtual tour of the shrine.

The simple graphic images you see from the Wu Liang Shrine were made from laying paper against the stone carvings that are inside the shrine and rubbing with ink to transfer the images onto paper. Learn more about this rubbing in our Object of the Week series.

The center line in this image depicts the story of a failed assassination attempt on Emperor Qin Shi Huang by Jing Ke. The figures, mostly in silhouette, move across the page presenting many parts of the story in one frame. This is an example of simultaneous illustration. Listen to a lecture on Telling a Story with Pictures to learn more about the differences between Eastern and Western visual narratives.

Create your own rubbing!

What you will need

  • Paper: A few sheets of lighter weight paper, along with some heavier paper or light cardboard (think drawing paper or cereal box).
  • Scissors or exacto knife
  • Pencil, crayon, chalk, or pastel

Warm up: Layer a small piece of the heavier paper under your lightweight paper. Take your pencil or crayon and rub over it, where the edges of the heavy paper sit, the crayon will be darker revealing the shape. Keep this in mind as you make a larger work. 

Next, start with something easy as you consider what story you want to tell with your rubbing. What are you currently watching or reading? Who is the main character? Follow the lead of the artists who carved the stone of the Wu family shrines and use simple shapes to depict your protagonist on the heavier paper. Draw each limb or clothing article as a separate shape, and draw their head in profile. You don’t need any detail, just flat non-dimensional shapes, like a paper doll.

Once you have these basic shapes, cut them out of your paper, and layer them together to make your character. Lay the thinner paper over them and rub with your pencil. You can add interesting textures by adding cuts to your figure’s shapes or by layering materials around the house like bubble wrap, or sandpaper.

Reuse the cutouts to animate your character across the page. What is your character doing? Think about an action that helps tell a story. For each move your character makes rearrange the paper cut outs and lay the lighter weight paper on top. Rub your crayon or pencil over the paper to make an impression, then move the cut outs for the next action and rub again.

We’d love to see your artwork—share it with us while #StayHomeWithSAM.

– Lynda Harwood-Swenson, SAM Assistant Manager for Studio Programs  

We are humbled by the generosity of our donors during this unique time. Your financial support powers SAM Blog and also sustains us until we can come together as a community and enjoy art in the galleries again. Thanks to a generous group of SAM trustees, all membership and gifts to SAM Fund will be matched up to $500,000 through June 30!

Wu Liang Shrine: Chinese History and Mythology, ca. 1920s, Han Dynasty (206 BCE–220 CE), Eugene Fuller Memorial Collection, ink rubbing on paper, 35.587.2

SAM Creates: Powerful Portraits the Wiley Way

Kehinde Wiley is known for shifting the grand tradition of western portraiture. His work combines contemporary sitters painted in the style of famous 18th-century portraits. Through his paintings and sculpture, he is weaving together ideas of identity, power and beauty. In Anthony of Padua, painted in 2013, his sitter is dressed in contemporary dress, but the title and pose are borrowed from Jean-Auguste-Dominique Ingres’ late-19th-century stained glass window depicting Saint Anthony of Padua at the Chapelle St. Ferdinand, Porte des Ternes, Paris. Wiley’s Anthony is wearing an olive green army style jacket with patches and what look like green sweat pants. Wiley did that, he says, to reveal a place in time. He wanted the viewer to see what it looks like and feels like to be in America in this time period.

Wiley also says that seeing is a way of receiving culture. During this unprecedented stay at home order the Zoom lens is shifting our idea of portraiture for our current time. To capture this moment in time let’s do Zoom portraits!

What you’ll need

  • Paper
  • Pen and/or pencil
  • Zoom meeting or other digital gathering allowing you to be face to face with at least one person

Warm up: Do a one minute blind contour drawing. A blind contour drawing is a continuous line drawing done without lifting the pen off the paper and not looking at your paper at all. Keep your eyes on your subject, don’t worry about the outcome. Set a timer, go slowly, its okay to move back over your line. If you want, you can start by tracing what you see with your opposite finger (on your other hand). This process will help train your brain to see simple shapes and improve observational skills. The imperfections will be interesting.

Next, move on to the portraits: Set a timer for 15 minutes. Leave your microphone on so that you can chat without having to break your focus by fiddling with your computer. Start by drawing the grid of boxes. Then use each box to capture your different subjects with just a few lines. This exercise is part gestural and part contour drawing. You can look at your paper, but focus on your subject and try to reveal them in few well-chosen lines. 

Once the timer rings share your work with each other and be gracious, this is less about product and all about process. 

Share your artwork with us using #StayHomeWithSAM! And if you want to keep creating, check out this digital art interactive where you can create Wiley-inspired patterns .

Lynda Harwood-Swenson, SAM Assistant Manager for Studio Programs  

We are humbled by the generosity of our donors during this unique time. Your financial support powers SAM Blog and also sustains us until we can come together as a community and enjoy art in the galleries again. Thanks to a generous group of SAM trustees, all membership and gifts to SAM Fund will be matched up to $500,000 through June 30!

Image: Anthony of Padua, 2013, Kehinde Wiley, oil on canvas, 72 × 60 in., Gift of the Contemporary Collectors Forum, 2013.8 © Kehinde Wiley

SAM Creates: Collage Covered with Teresita Fernández

“I want you to feel like you are moving through a landscape painting or movie rather than within the landscape itself, blurring the lines between your presence as participant and observer.”

 – Teresita Fernández

Teresita Fernández’s atmospheric work Seattle Cloud Cover uses ideas of place, pattern, and color to create an experience for the viewer that is their own. The work is site-specific, commissioned by SAM to act as a bridge connecting the city with the waterfront. With those three elements—place, pattern, and color—we’ll create an artwork inspired by Fernández’s Seattle Cloud Cover, layered with symbolism and meaning. Watch this video for a better look at the artwork before getting started.

What you’ll need

  • Paper
  • Landscape images
  • Pencil or pen
  • Watercolors or semi-transparent markers, or colored pencil

You can also create this work entirely on the computer through Kleki, a free, image-editing and creation website. 

Place: Choose an image from your collage materials that has some meaning to you or is appealing to your senses. In Seattle Cloud Cover, Fernández uses images of Miami sunsets where she was born. You can tear or cut up your image and place the pieces around the page or use the whole image. Before you glue down your collage pieces think about how you might want to incorporate the elements of pattern and color into your composition. 

Pattern: In Seattle Cloud Cover, Fernández uses Ben-Day dots to create a polka-dot grid, which she calls “porthole.” Through these cut out dots you can catch glimpses of the Seattle landscape. Ben-Day dots are typically used in comic books to create tone. On sunny days, the Ben-Day dots act as spotlights for the sun to shine through, transforming the space and the people in it. How might a pattern change your collaged place? Where could you add this pattern? Is there something in the image that could be the beginning of a pattern? 

Color: The deep oranges, reds, violets and blues in Fernández’s Seattle Cloud Cover create their own sensation within the work. What colors will add another layer of meaning or symbolism to your work? Color can be added to the pattern, layered into the landscape, or used as a way to enhance and connect the work.

– Kelsey DonahueSAM Assistant Manager for Gallery Learning & Lynda Harwood-Swenson, SAM Assistant Manager for Studio Programs  

We’d love to see your work! Share your completed piece using the hashtag #StayHomeWithSAM

We are humbled by the generosity of our donors during this unique time. Your financial support powers SAM Blog and also sustains us until we can come together as a community and enjoy art in the galleries again. Thanks to a generous group of SAM trustees, all membership and gifts to SAM Fund will be matched up to $500,000 through June 30!

Images: Seattle Cloud Cover, design approved 2004; fabrication completed 2006, Teresita Fernández, laminated glass with photographic design interlayer, approx. 9 ft. 6 in. x 200 ft. x 6 ft. 3 in., Olympic Sculpture Park Art Acquisition Fund, in honor of the 75th Anniversary of the Seattle Art Museum, 2006.140, © Teresita Fernández.

SAM Creates: Suit Up with Walter Oltmann

While a human-caterpillar hybrid such as Walter Oltmann’s Caterpillar Suit I, may seem strange, it’s completely appropriate for these strange times that we’re currently living in. The tiny hairs that encompass the insects referenced in Walter Oltmann’s work are called setae. The function of these hairs are practical—they’re connected to nerve-endings and give caterpillars a sense of touch—as well as a defense mechanism. A recent study showed that the longer and denser the setae, the less likely predators were to eat the caterpillars. 

Looking at Oltmann’s work in the era of coronavirus brings to mind biomimicry. Biomimcry is described by the Biomimcry Institute as “the practice of applying lessons from nature to the invention of healthier, more sustainable technologies for people.”[1] Another way to understand this concept is through antennae-inspired outfits, designed to help with social distancing.

What ways can nature spur ideas to help us adapt to our new normal? Come up with your own biomimicry design for coronavirus through drawing. Oltmann makes more than sculptures, he also creates drawings and prints with similar designs as his sculptures. We’ll use this approach for our activity.

What you’ll need

  • Paper
  • Pencil
  • Eraser
  • Fine-tipped marker or pen.

With drawing, like any physical activity, you may want to start with a warm up. Try sketching some simple shapes to warm up your drawing muscles!

Sketch a figure drawing of yourself or have someone in your home pose for you!

First, draw in pencil, then outline the essential lines in marker or pen. Erase the pencil marks. Your figure should be a very simple form, like a gingerbread man shape.

Next, think about ways that nature, your favorite animal, or an ecosystem protects itself. For caterpillars, it might be a visible attribute, such as setae protecting against predators, but it could also be a non-visible process, like how they consume poisonous milkweed without getting sick. For inspiration check out asknature.org.

Draw this natural defense attribute onto the figure you’ve drawn using lines, shapes, or patterns.

Share your innovative ideas with us by posting using the hashtag #StayHomewithSAM and celebrate everyone working hard in the midst of this pandemic to find practical ways of protecting us from the coronavirus.

– Kelsey DonahueSAM Assistant Manager for Gallery Learning & Lynda Harwood-Swenson, SAM Assistant Manager for Studio Programs

1 https://toolbox.biomimicry.org/about-the-toolbox/
Image: Caterpillar Suit I, 2007, Walter Oltmann, anodized aluminum and brass wire, 46 7/16 x 23 1/4 x 16 9/16 in., Gift of Josef Vascovitz and Lisa Goodman in honor of Kimerly Rorschach, 2019.25.1, © Walter Oltmann.

Things To Do For Earth Day & Every Day

In the spirit of the 50th anniversary of Earth Day tomorrow––and our current stay-at-home situation––we’ve compiled a few resources and recommendations from members of SAM’s Green Team for April 22 as well as a fun art activity for all ages!

Earth Day is the first holy day which transcends all national borders, yet preserves all geographical integrities, spans mountains and oceans and time belts, and yet brings people all over the world into one resonating accord, is devoted to the preservation of the harmony in nature and yet draws upon the triumphs of technology, the measurement of time, and instantaneous communication through space.

– Margaret Mead, cultural anthropologist, 1978


Check out Earth Day Northwest 2020 

#Next5 actions features tips to effectively reduce your home energy bill and work toward zero-waste! A few ideas below, since we’re all at home more these days.

100% Clean Energy

  1. Turn off lights, use turn-off power strips and unplug all appliances that you are not using. 
  2. Set the thermostat to 68°F or lower when you’re at home and awake, and lower 7°F to 10°F when you’re asleep or away.
  3. Turn down your water heater to 120°F or the “low” setting. 
  4. Run your washing machine and dishwasher only when full.
  5. Using a ceiling fan to circulate air can lower both your cooling and heating costs (counterclockwise recirculates warm air).

Zero-Waste

  1. Recycle right: Empty. Clean. Dry. 
  2. Reduce, reuse and up-cycle: donate or give new life to old clothes and home goods instead of throwing them out.
  3. Target food waste – reduce, donate, and compost. 
  4. Reduce or eliminate single-use plastic.
  5. Avoid last-minute purchases and reduce excess by making a shopping list- and sticking to it.

Articles 

Books/Poetry

Podcasts

Movies

  • Ice on Fire, 2019  (Hulu and HBO)
  • Chasing Coral, 2017  (Netflix)
  • Before the Flood, 2016  (Disney and Amazon Prime)
  • How to Let Go of the World and Love All the Things Climate Can’t Change, 2016  (iTunes)
Takpekpe (Conference), 2006, El Anatsui

In SAM’s galleries, you will find artist El Anatsui’s sculpture, Takpekpe (Conference) draped on the wall. From a distance, the artwork appears to be a gold, purple, and red tapestry, or wall hanging. But up close, you will notice interesting materials the artist has chosen for his artwork – metal tops from recycled bottles and cans. El Anatsui, who lives and works in Nigeria, creates his sculptures from metal, wood, and reused materials from bottles and packaging. The artist works collaboratively with a team to create sections of theses materials, arrange the sections in different positions on the floor, and then take pictures of the arrangements to document the process. Through a practice of experimentation and play, El Anatsui creates sculptures of different patterns and colors that represent abstraction in African Art.

In honor of Earth Day, we want to consider ways to minimize our waste and reuse items in our home recycling bins. What types of packaging or plastic do we often have in our homes? Where might these items go when they leave our homes? How can we creatively reuse items like packaging, bottle caps, and plastics?

Art Activity

El Anatsui gathers packaging, bottle tops, and other items to create artwork. Through a process of play and experimentation, the artist creates patterns and documents these with photographs. These images help guide El Anatsui to create new sculptures.

Play, experiment, and create your own recycled material artwork!

  • Gather recycled materials in your home over a week. Ask yourself if an item could become an interesting art material before you place it in the garbage or recycling bin. Rinse off the material and set aside until you are ready to begin creating.

Some items you could collect include: cardboard boxes, paper tubes, bottle caps, aluminum can tabs, foil yogurt lids, egg cartons, twist ties, and cereal boxes.

  • Once you have some recycling gathered, imagine how these items can be transformed. Can they be cut, twisted, folded or combined to create a new material?

For example, you could cut paper tubes into rings, cut shapes out of cardboard boxes, or trim egg cartons into smaller objects.

  • Lay your materials out on a surface and move them around to see what patterns you can create. Take pictures along the way to document your experiments! Try arranging the materials into groups by size, color, shape, texture, transparency. Or into patterns!
  • Once you find a pattern you like, glue or tape your materials to a piece of cardboard to finish your artwork. Share your abstract recycled artwork on social media using #StayHomewithSAM.

– Maggie O’Rourke, Program Associate for Arts and Environment

Images: Installation view of Takpekpe (Conference) by El Anatsui, photo: Natalie Wiseman. Art making images: Maggie O’Rourke.

SAM Creates: Drawing from Margaret Gove Camfferman

Margaret Gove Camfferman was an early Northwest modernist whose colors and compositions reveal her love of the Pacific Northwest landscape. The soft palette of colors, blooming trees, and gentle light on the Sound reveal as much about the painter in that moment as the scene she painted. To learn more about Landscape before starting this art activity, click here!

Create your own landscape inspired by Camfferman’s work by choosing a landscape to work from. You can work from real life, a photograph, or an imagined landscape. For materials, you will need paper, pencil, and—if available—any kind of paint, pastels, crayons, or markers to add color.

Once you find your inspiration, start by completing some thumbnail sketches. Draw a series of little boxes on your paper and experiment with your composition. Keep it loose, and draw the scene in a few different ways. Compose in both portrait and landscape formats to see what is most effective.

To create the illusion of space in your work, start by thinking about where the horizon line is. In Camfferman’s Landscape the horizon line is in the upper third of the painting, and her vanishing point is obscured by the tree in the upper left corner. She uses them as tools in her composition to provide the illusion of space.

As you’re sketching, think about what objects are in the foreground (closest to you), middle ground, and background (furthest from you). Objects in the foreground are larger than objects in the middle or background in order to make them appear closer to you.

After finding a composition you like, translate it into a larger drawing; you can still work fairly small if you want—think of this as a study. In pencil, draw the basic shapes in the landscape, leaving out the details.

Now, add color: setting up your palette in advance can help you control the mood and tone of your composition. Working with a limited palette of colors that relate to one another creates harmony in the work. If you need inspiration, check out Coolors for samples of warm, cool, pastel, or vintage color palettes. Like Camfferman, skip the details and try using planes of color to create form and volume in your landscape.

After you’ve laid down some of the larger shapes, add some finer lines to help tell your story.

Take this further by creating a series of works, recording the daily changes in nature and the landscape we live in. Share your work with us using the hashtag #StayHomeWithSAM.

Kelsey Donahue, SAM Assistant Manager for Gallery Learning & Lynda Harwood-Swenson, SAM Assistant Manager for Studio Programs

SAM Creates: Through Imogen Cunningham’s Lens

Imogen Cunningham’s photograph, Magnolia Blossom, Tower of Jewels, looks closely at its subject. Through her use of macro photography—making an object appear larger-than-life—Cunningham isolates the flower from its context and transforms an everyday subject into a work of art. Her contemporary, Georgia O’Keeffe, used similar strategies in her paintings, magnifying a flower’s inner structure in order to emphasize shape and form. Look around at your houseplants, head outside to the yard, or go on a stroll to find your inspiration. 

Cunningham would have likely used a 4×5” camera and her chemistry degree from the University of Washington when she created her botanical prints. Luckily, most of us can use our smartphone cameras, which are a lot smaller, lightweight, and instantly “develop” our images.

National Museum of American History
Camera, view, American Optical. PG*4626A.

Before you start, take a minute and clean your camera lens. You can clean the lens with a microfiber cloth or a cotton swab moistened with distilled water can also take off stubborn grime.

Start your walk or find a spot to sit and be still. Take a few minutes—or steps—and observe your environment. What are you drawn to? Get closer to an object. Is there an interesting macro photography subject to explore?

Once you find your subject, move your phone as close to the object as you can to remove any context like a neighbor’s house, your fence, or the couch.

As you’re discovering your composition, consider the rule of thirds, which divides an image into nine equal rectangles and places points of interest where grid lines intersect. You can overlay a grid in your camera viewfinder by selecting it as an option in your phone’s settings. 

After choosing your composition, explore the focal plane, or angle at which you’re shooting your camera, by moving your phone above, in-line, and below the subject. The most common issue in macro photography is misalignment or a poor positioning of your camera lens, resulting in a blurry photo. To achieve the best focal plane, touch your smartphone screen directly where you want the emphasis of your composition to be. This will focus the lens and automatically adjust the light settings to that specific area. 

Once you’re done shooting, use your phone’s editing tools to enhance your work. Test out how your image looks in black and white or silvertone for an extra nod to Cunningham’s process!

Save and share your work by uploading to social media using the hashtag #StayHomewithSAM. 

Want to take the work further? Do a drawing of your photo, abstracting the subject like Georgia O’Keeffe or evoke your inner Emily Dickinson and write a poem inspired by your botanical imagery. 

Kelsey Donahue, SAM Assistant Manager for Gallery Learning & Lynda Harwood-Swenson, SAM Assistant Manager for Studio Programs

If you value the ways SAM connects art to your life, consider making a donation or becoming a member today! Your financial support powers Stay Home with SAM and also sustains us until we can come together as a community and enjoy art in the galleries again.

Image: Magnolia Blossom, Tower of Jewels, 1925, Imogen Cunningham, gelatin silver print, 11 1/4 x 8 1/4 in., Gift of John H. Hauberg, 89.67 © (1925), 2009 Imogen Cunningham Trust.

Make Dreams Come True with Jung Yeondoo

Since 2001, South Korean artist Jung Yeondoo has visited six different countries to make people’s dreams come true. In his Bewitched series, he asks local people about their wishes for their future and then makes them come true with a pair of photographs: the first, a portrait of the person in their everyday life and the second, showing their dream or fantasy. Bewitched #2 Seoul shows a Baskin Robbins employee at her job next to her dream of going to the Arctic. Her change in clothing, accessories, and setting changes how we see her and shows us a part of her that we might not know about upon first glance. Jung uses costumes, settings, and props to transform a scene from everyday life into the individual’s dream.

Speaking about his inspiration, Jung said in a 2015 profile, “I started this project with an artist’s curiosity about wanting to know about the lives of people you just pass every day,” he said. “It’s not about a happy perspective or a negative perspective . . . It is more about [my] attempts as an artist to communicate with someone else.”

Jung Yeondoo Helps 28 People Realize Their Dreams by Taking Pictures

Looking questions

  • What’s going on in these artworks? What do you see that makes you say that? What more can we find?
  • What words would you use to describe the person in each photograph, based on what they are wearing? Are there any words that would describe both of them?
  • Look closely at the image on the left. What do you think are some things this person does every day? What do you see that makes you say that? Now do the same for the image on the right.
  • Why do you think you see the same pose in both images? What does it feel like to pose in that way?
Hear from actor Hudson Yang as he looks closely at Bewitched #2

Visualize

Take a moment to close your eyes and ask yourself these same questions: What is your dream? What is your fantasy? Who do you want to be? Think about this dream that you have for yourself. In this imagined future, what are you wearing? What are you doing? What are your surroundings? Time yourself for five minutes and free-write or draw any ideas that you have. Don’t worry about making it look or sound good, this is just to document your ideas.

Art Activity

Create a drawing or collage that represents the daily life and imagined dream of someone you know.

  • Call a friend and ask each other questions to learn more about your everyday lives, just like Jung Yeondoo interviews the people that he works with. Be sure to write down words that describe what they are saying! Here are some example questions:
  • Where are you right now? What does it look like there? What do you see around you?
  • What part of your daily routine happens in this space? Describe that routine.
  • Who else spends time here? Is anyone there now? What are they doing?
  • Is there anything else that you want to share?

Now, interview each other about your future dreams. This could be three months from now or far into the future. What is your dream? What is your fantasy? Who do you want to be? Keep digging—ask for more details that can help you imagine their dream. Write down more descriptive words as you listen.

For this next part, you can choose to either

Make a drawing!

  • Divide a blank sheet of paper in half. On the left side, create a drawing of your friend in their current daily life. On the right side, create a drawing of them in their imagined dream.
  • Tell a story with your drawing—the more details that you can include from the interview, the better!

Make a collage!

  • Choose a blank sheet of paper or piece of cardboard for your base. You’ll need: old magazines, newspapers, or other printed papers, a pair of scissors, and glue.
  • Cut out words and images from the magazines that remind you of what you learned about your friend in these interviews. Divide your cutouts into two piles: your friend’s everyday life and their wish for the future.
  • Draw a line dividing your base in half. On the left side, create a collage using the cutouts related to your friend’s everyday life. On the right side, create a collage using the cutouts related to your friend’s wish for the future.

When you are done, send each other photos of your artwork or exchange them the next time you see each other. What are some things that you learned about yourself and each other in this process?

– Yaoyao Liu, SAM Museum Educator & Lauren Kent, SAM’s Museum Educator for School Programs & Partnerships

Image: Bewitched #2 Seoul, 2001. Jung Yeondoo. C-print photograph. 62 5/8 × 51 9/16 in. (159.1 × 131 cm) Purchased with funds from the Estate of Rosa Ayer, 2016.8.1–2.

Inside Georgia O’Keeffe: Abstract Variations

Stay home with SAM and see inside Georgia O’Keeffe: Abstract Variations, zoom in on some early O’Keeffe drawings using our online interactive, and make some art of your own following along with the activity below.

“I found that I could say things with color and shapes that I couldn’t say any other way—things that I had no words for.”

– Georgia O’Keeffe

These words from a 20th-century artist best known for her paintings of flowers and desert landscapes may be surprising. “She had a very particular iconography, so we don’t typically think of her as an abstractionist,” says Theresa Papanikolas, SAM’s Ann M. Barwick Curator of American Art. Abstract Variations offers us a chance to broaden our perspective on this celebrated artist through a focused selection of 15 of her paintings and drawings, as well as portraits of her by Alfred Stieglitz, the photographer who eventually became her husband. The accompanying catalogue examines O’Keeffe’s pioneering innovations into abstraction.

You may be familiar with Music, Pink and Blue, No. 1, O’Keeffe’s first major oil painting, now in SAM’s collection. Abstract Variations also includes Music, Pink and Blue, No. 2, a loan from the Whitney Museum of American Art, bringing these two landmark paintings together in Seattle for the first time. Experiencing them alongside other works from this pivotal period in O’Keeffe’s career offers a glimpse into her practice. “There’s a tangible tension between geometry and curvilinearity in these early works,” says Papanikolas. “When you see them in person, they look as if they’re vibrating.”

Zoom in on Georgia O’Keeffe’s Drawings »

Take a good look at all the details in these charcoal drawings from the collection of the National Gallery of Art in Washington, D.C. Like many of us right now, these precious drawings have to stay home. O’Keeffe’s earliest works on paper are extremely fragile and therefore unable to travel, but we can still enjoy them—just click or tap on the image above!

Art Making Activity

The painting above by Georgia O’Keefe is called Music, Pink and Blue, No. 1. Like many paintings the artist made, its shapes and colors are inspired by music. Can you make a drawing of a song?

  • Choose a song that makes you feel happy, sad, calm, or excited. Close your eyes and think about what you hear: What lines, shapes, and images appear? What colors do you see? What more can you imagine?
  • Find a pencil and a piece of paper and listen to the song a second time. This time, take a deep breath and let your hand move around the paper to draw lines and shapes that connect to the music. You can draw fast or slow, whatever feels natural to you. Try not to think too much, just draw and capture the images from your imagination.
  • When the song is finished, you can add to or change the drawing that you have started. You might choose to press your pencil down to shade some areas darker and leave some areas light. You might choose to erase some sections and add additional shapes and lines. You might use other materials to add color or texture to your drawing.
  • When you have finished, display your drawing on the floor, a table, or pinned onto the wall or refrigerator. See what it looks like up close and far away. Ask people around you what looking at your drawing makes them think about or feel. Does it bring any music to their mind?

These process images are an example of Lauren Kent, SAM’s Museum Educator for School Programs & Partnerships, drawing to “Wuthering Heights” by Kate Bush at her kitchen table. We want to see your artwork! Share a photo of your drawing and the song that inspired you with us via email or on social media using #StayHomewithSAM!

If you value the ways SAM connects art to your life, consider making a donation or becoming a member today!

Artwork: Georgia O’Keeffe, American, 1887–1986, Music, Pink and Blue, No. 1, 1918, oil on canvas, 35 x 29 in., Seattle Art Museum, Gift of Barney A. Ebsworth, 2000.161, photo: Paul Macapia

Everything You Wanted to Know About Middle Fork

“I like to think of the sculpture as a sort of skin that’s been shed by the tree, and that it’s thickness is roughly commensurate with how long it would take the tree to grow the same thickness as the sculpture. So in a way, what we’re talking about is something that’s an ode to those two years in the life of the tree.”

– John Grade

John Grade’s large-scale sculpture, Middle Fork, echoes the contours of a 140-year-old western hemlock tree located in the Cascade Mountains east of Seattle. Suspended above the Brotman Forum at our downtown location, this massive commissioned artwork involved the help of many hands. Volunteers, including SAM Staff, contributed time and thought to the placement of each small piece of cedar that was used to create this stunning sculpture. Watch this video for an in-depth look at the process of creating this work: from working with arborists to cast the living tree, to working with art handler to install hanging sections at SAM—Grade’s installation is an impressive reminder of art’s power to bring people together under its many branches.

Art Making Activity

Eventually John Grade’s sculpture will go back to the forest and decompose back into the soil. This makes us think about the circle of life for trees and wonder how humans are connected to nature and how is nature connected to humans? What materials do we use all the time that come from trees?

Create your own sculpture of a tree using a paper bag!

  1. Find a paper bag of any size, open it and place it on a table. If you want, you can put a small square of cardboard inside the bottom of your bag to make it more stable.
  2. Make cuts from the top of your bag down to the middle of your bag. I chose to do eight cuts, but you can do more or less! This will make flaps at the top of your bag.
  3. Squeeze the bottom of your bag together and twist it as tight as you can. This will be the trunk of your tree. Just like you squeezed the trunk, squeeze together two top flaps at a time. These will be your branches.
  4. Move your branches around and look at your tree from every angle. Move your tree to different locations and build more trees to make a forest. Each one will look different.
  5. Think about the life cycle of your tree: it was a living tree, then paper, then a paper bag, and now you turned it into a sculpture of a tree. What will happen to it next? What is it like to have a tree indoors? What does it make you think about or remind you of?

We want to see your artwork! Share a photo of your tree with us via email or on social media using #StayHomewithSAM!

Story Time Suggestions

Because of an Acorn, by Lola M. Schaefer & Adam Schaefer. See the book read out loud here.
This book illustrates the interconnectedness of the natural world, showing how a tiny acorn connects to the plant and animal life of an entire forest.
The Giving Tree, by Shel Silverstein. See the book read out loud here or here.
This controversial yet classic tale can be read as a parable between humanity and nature.
The Lorax, by Dr. Seuss. See the book read out loud here.
This classic environmentalist tale reminds readers, “Unless someone like you cares a whole awful lot, nothing is going to get better. It’s not.”

If you value the ways SAM connects art to your life, consider making a donation or becoming a member today!

– Chelsea Werner-Jatzke, Content Strategist & Social Media Manager

Image: Middle Fork, 2014–2017, John Grade, American, B. 1970, cedar, 105 ft. long x 30 ft. diameter, Seattle Art Museum commission, Photo: Ben Benschneider.

Graphic Content: Woodcut

This is it, people. Less than a week left to get your fill of Graphic Masters: Dürer, Rembrandt, Hogarth, Goya, Picasso, R. Crumb before it closes August 28. In this, the last week of our groundbreaking summer exhibition, we deliver our final crash course in printmaking with a quick introduction to woodcut.

Get up close and personal with the rich history of woodcut prints by viewing Albrecht Dürer through the magnifying glasses provided in the Graphic Masters galleries. With more than 400 artworks by six artists, you’ll want to give yourself plenty of time to soak up the details during your visit to SAM.

Woodcut

What is a woodcut?

Dating back to the 14th century, woodcut was the first process developed in Europe for printing on paper. Woodcuts are a relief process —the artist makes a drawing on the block and chisels everything else away, leaving the raised lines on the surface intact. Before printing, a uniform layer of ink is rolled onto the wood block surface using a brayer.

Woodcuts are characterized by crisp outlines and a sharp contrast between the black ink and white paper. Dürer used hatching, a series of parallel lines that vary in thickness and frequency, to create a mid-toned background for Christ’s divine halo.

Images: The Last Supper, from The Large Passion, 1510, Albrecht Dürer, German, 1471–1528, woodcut, 17 5/16 × 12 1/16 in., Lent by The Metropolitan Museum of Art, The George Khuner Collection, Gift of Mrs. George Khuner, 1975 (1975.653.12). Illustrations: Time Marsden.

Graphic Content: Aquatint

This week on Graphic Content we discuss aquatint, another intaglio method of printmaking. This is a oft-used method of Goya’s in his Los Caprichos series. Speaking of . . . you’ve only got two more weeks to see 80 prints from the Los Caprichos series in Graphic Masters: Dürer, Rembrandt, Hogarth, Goya, Picasso, R. Crumb.

This huge exhibition showcasing over 400 print works created across 500 years closes August 28. That means, you’ve got one more Press & Print: Drop-in Studio where you can experiment with the techniques you see in the exhibition. Also, coming up is the final My Favorite Things tour of the exhibition with Jessixa Bagley.

Aquatint

Goya was so adept at this technique he could create a print entirely in aquatint. Check out plate thirty-two of Los Caprichos in this show and see if there is an etched line in sight.

A variation of the etching process, aquatint allows for areas of printed tone in order to achieve a more painterly effect. Instead of a uniformly brushed on ground, powdered rosin is dusted onto the plate until the desired coverage is achieved. The acid eats away the unprotected portions of the plate between the rosin particles, resulting in a rich, speckled effect.

Los Caprichos: Por que fue sensible. (Because she was susceptible.), 1796–1797, Francisco Goya

Goya used aquatint to create a dank, gloomy prison cell that mirrors the despair of this unfortunate young lady.

IMAGES: Illustrations: Tim Marsden. Los Caprichos: Por que fue sensible. (Because she was susceptible.), 1796–1797, Francisco Goya, Spanish, 1746–1828, aquatint, 8 7/16 × 6 in., Private Collection.

Graphic Content: Etching

Make something! We’re here to help with more than just artistic inspiration and influence. The Graphic Content blog series offers a weekly debrief on different types on printmaking and helps point out examples of them that you can find in Graphic Masters: Dürer, Rembrandt, Hogarth, Goya, Picasso, R. Crumb.

August is the final month of Graphic Masters, which means you’ve only got three more Press & Print: Drop-In Studio events left to learn the printmaking techniques of the masters! Here’s your weekly primer on etching, a type of intaglio printing that Rembrandt uses in combination with drypoint in Christ Healing the Sick. Come to SAM and see.

Etching

Etching

Instead of removing metal from the plate through force, etching uses a chemical process. The plate is prepared by brushing on a thin layer of waxy, acid-resistant covering called ground. The design is scratched through the ground, revealing the plate below. Compared to engraving, very little pressure is needed, allowing for fluid lines more akin to drawing. The entire plate is then submerged in acid, which etches, or bites, the exposed metal. Once the desired effect has been reached, the plate is removed from the acid bath and the ground cleaned off. It is then inked and printed through the same process as engraving.

Etching

The depth of an etched line is determined by how long the plate is submerged in acid. To achieve dramatic tonal variations, Rembrandt removed the plate from the acid and applied more ground to protect the lighter areas before submerging the plate again—a process called stopping out.

Images: Christ Healing the Sick (The Hundred Guilder Print), 1643, Rembrandt van Rijn, Dutch, 1606–1669, etching and drypoint, 11 1/8 × 15 1/4 in., Private Collection. Illustrations: Tim Marsden

Graphic Content: Drypoint

We continue to dig in to the printmaking on view in Graphic Masters: Dürer, Rembrandt, Hogarth, Goya, Picasso, R. Crumb with another technique requiring carving—drypoint, a type of intaglio printing. Last week we discussed engraving, a method that produces clean, smooth lines. Drypoint, on the other hand, produces a more textured and ephemeral effect offering delicate and subtle touches. Looking for a more hands-on learning experience? Check out our Press & Print: Drop-in Studio events taking place Sundays, 11 am–1 pm through August!

Drypoint

Similar to engraving, drypoint requires the artist to carve directly into the plate surface. What distinguishes this technique is the way the drypoint needle displaces the copper to form burr—jagged furrows and curls of rough metal on the surface. The burr grabs and holds the ink, resulting in rich, fuzzy lines. Because repeated pressure from the printing process quickly wears down the burr, the effect is fleeting and early impressions are considered the finest and most sought after.

Saint Jerome Beside a Pollard Willow, 1648, Rembrandt van Rijn

Ink captured by the burr spreads out on the paper, resulting in caterpillar-like lines. In this etching, Rembrandt added touches of drypoint to accentuate the texture of the foliage.

Saint Jerome Beside a Pollard Willow, 1648, Rembrandt van Rijn, Dutch, 1606–1669, etching and drypoint, 7 1/16 x 5 1/4 in., Seattle Art Museum, Gift of Dr. Leo Wallerstein, 53.186.
Illustrations: Tim Marsden

Graphic Content: Engraving

Last week on Graphic Content, we introduced printmaking and the intaglio method. This week we discuss engraving, a type of intaglio, used by William Hogarth for his print series in Graphic Masters: Dürer, Rembrandt, Hogarth, Goya, Picasso, R. CrumbWant to learn more? Study the effects of this method with a visit to SAM and get more tips on printmaking by working with local artists during Press & Print: Drop-In Studio.

Check back weekly through the run of Graphic Masters for more information on different types of printmaking and get creative in and out of the museum.

Engraving

Engraving

To make an engraving, the artist incises a design into the plate using a burin, a tool with a sharp diamond-shaped tip that creates smooth lines with crisp edges. Significant pressure and a steady hand are needed to force the burin into the plate and cleanly remove the excess copper from the surface. Because of the immense skill involved, some artists employed professional engravers to execute their designs.

The Harlot Finds a Protector" (detail) by William Hogarth, 1732

Whether calligraphic curves or stippled dots, engraved lines are clean and precise. Hogarth employed cross-hatching, the angled intersection of hatched lines, to achieve a great range of textures and tones.

IMAGES: The Harlot Finds a Protector, 1732, William Hogarth, English, 1697–1764, engraving, 12 3/8 x 15 1/16 in., Seattle Art Museum. Gift of Lloyd Spencer, 44.298. Photo: Elizabeth Mann. Illustrations: Tim Marsden. The Harlot Finds a Protector (detail), 1732, William Hogarth.

Graphic Content: What is a Print?

Get a primer on the printmaking techniques of the masters in Graphic Masters: Dürer, Rembrandt, Hogarth, Goya, Picasso, R. Crumb. Try making your own prints at home after you’ve been inspired by your visit to SAM, or check out our Press & Print: Drop-In Studio sessions while at you’re at the museum and put these tips into practice with the guidance of local artists.

Let’s start simple!

What is a print?
At its most basic, a print is a work of art on paper that’s produced in multiples from an inked surface. While various types of printmaking exist, the basic components are the same—an inked wood block or plate, a sheet of paper, and a press that transfers the ink to the paper. The process is repeated many times, resulting in multiple impressions of the same image. Voila, a print edition!

How to make a Potato Print!

The development of printmaking
Following the invention of the printing press in the 15th century, printmaking gained popularity as an inexpensive way to disseminate visual information to a mass audience. Early prints—typically illustrations in books or reproductions of famous paintings—tended to be relatively small, affordable, and easily transportable. While fine paintings by important artists were too expensive for most people, prints were within reach.

The Development of Printmaking

Prints did not remain purely illustrative for long. Printmaking came to be seen as a distinct mode of expression capable of producing works of fine art. Artists like Albrecht Dürer established a tradition of virtuoso printmaking. His episodic handling of narrative through print series, like The Large Passion, laid the groundwork for later generations of graphic artists from William Hogarth to R. Crumb.

The technical innovations of artists like Rembrandt van Rijn and Francisco Goya pushed the boundaries of the medium and further elevated printmaking as an art form. Connoisseurs began to build collections of particularly fine impressions. Rembrandt’s Christ Healing the Sick was so sought after that it fetched prices usually associated with oil paintings, earning it the nickname “The Hundred Guilder Print.” But in general, prints remained accessible works of art meant to be viewed and appreciated up close.

Intaglio

Tools of the Trade

Intaglio (Italian for “carving”) is the opposite of relief. A linear design is carved into the surface of a polished metal plate, usually copper. Ink is worked into the entire plate and then the surface is wiped clean, leaving ink only in the recessed grooves and pits. As the printing process wears down the plate, the artist can rework the design to pull more impressions. Altering the plate surface results in a new version, or state. Some artists, Rembrandt in particular, used this opportunity to make dramatic changes to their compositions.

Christ Healing the Sick (The Hundred Guilder Print) by Rembrandt van Rijn

There are several types of intaglio printing: engraving, drypoint, etching, and aquatint. Artists may use just one technique at a time or a combination of several in a single print. We’ll cover each type of intaglio printing in the weeks to come, stay tuned!

IMAGES: Illustrations: Tim Marsden. Christ Healing the Sick (The Hundred Guilder Print), 1643, Rembrandt van Rijn, Dutch, 1606–1669, etching and drypoint, 11 1/8 × 15 1/4 in., Private Collection.
SAMBlog